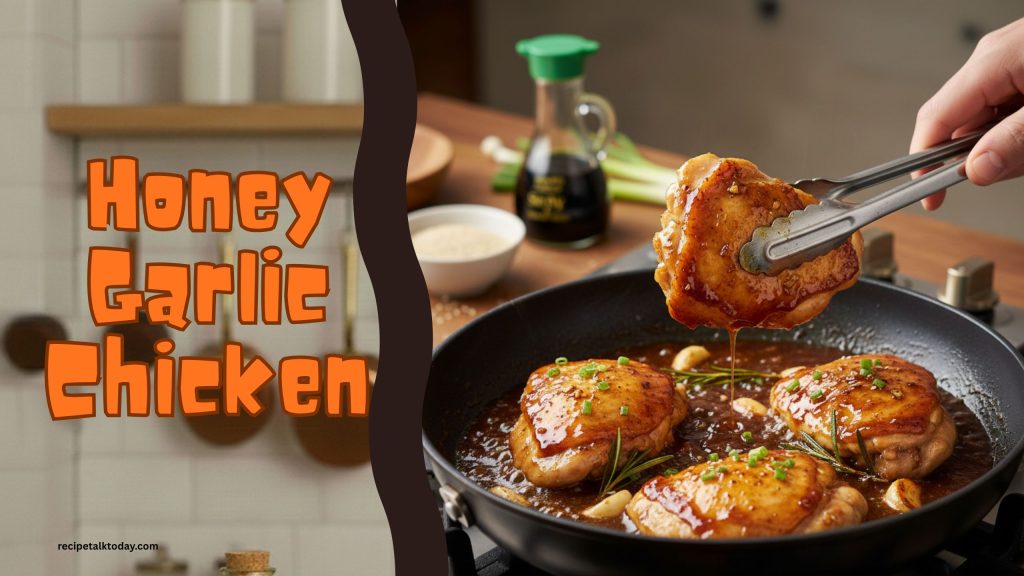
Want restaurant-style honey garlic chicken for your family dinner tonight? This quick recipe takes just 20 minutes and uses simple ingredients you probably already have at home.
Why This Recipe Works
This honey garlic chicken recipe is special because it’s truly easy. No fancy cooking skills needed. No strange ingredients to find at the store. Just simple, real food that tastes amazing.
The dish works because sweet honey and salty soy sauce are a perfect pair. When they cook together with fresh garlic, something magic happens. The sauce becomes sticky and glossy—it coats every piece of chicken like a beautiful glaze. Your family will think you spent hours cooking, but you only spent 20 minutes.
This is a real weeknight dinner for real busy people. You cook chicken one way, make the sauce in a small bowl, then let them cook together. That’s it. The chicken stays juicy inside and gets a nice golden color on the outside. Kids love it. Adults love it. It tastes better than takeout, costs less, and you know exactly what’s in it.
If you love this sticky glaze method, you’ll also appreciate Garlic Butter Chicken for a different savoury take on quick stovetop chicken, or try Lemon Chicken No Oven for a bright, fresh alternative using similar pan techniques.
This is the kind of recipe you’ll make over and over because it never fails, and everyone asks for seconds.
Ingredients
Easy to read. Use what you have at home.
For the Chicken (serves 4 people)
- 600g (1.3 lbs / about 4 medium) boneless chicken breasts OR chicken thighs
- 3g (½ teaspoon) salt
- 2g (¼ teaspoon) black pepper
- 15 ml (1 tablespoon) cooking oil

For the Sauce (this is the star of the dish)
- 60 ml (¼ cup / about 4 tablespoons) honey (real honey works best, but any honey is fine)
- 30 ml (2 tablespoons) soy sauce (use what you have—regular or low-sodium both work)
- 4 cloves garlic, minced (or 2g / ½ teaspoon garlic powder if fresh garlic is not available)
- 15 ml (1 tablespoon) rice vinegar or white vinegar (if you don’t have this, use lemon juice or apple cider vinegar)
- 120 ml (½ cup) water or chicken broth
Optional (makes it even better, but not necessary)
- 5g (1 teaspoon) cornstarch mixed with 15 ml (1 tablespoon) water (this makes sauce thicker and stickier)
- Small pinch of red pepper flakes (for a little heat—totally optional)
To Finish (nice but optional)
- Fresh green onions, chopped (for looking pretty)
- Sesame seeds (just a sprinkle)
Equipment Needed
You probably have all of this already:
- 1 large pan or skillet (the kind you cook eggs in)
- 1 small bowl (for mixing sauce)
- 1 spoon or spatula (for moving chicken around)
- 1 knife and cutting board
- Paper towels
- A small measuring cup or spoon
That’s really it!
Step-by-Step Instructions
Read through all the steps first. It’s easier than it looks.
Getting Ready (3 minutes)
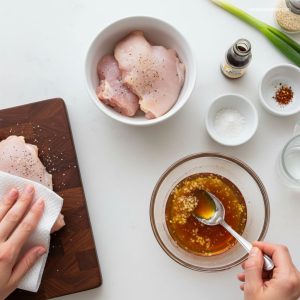
- Pat the chicken dry: Take the chicken out of the package. Use paper towels to pat it dry. Drying it helps it cook better and brown nicely. Don’t skip this—it matters.
- Season the chicken: Sprinkle a little salt and black pepper on both sides of the chicken. Just a small amount. Not a lot.
- Prepare the sauce: In a small bowl, mix honey, soy sauce, minced garlic (or garlic powder), and vinegar. Stir it well with a spoon. It should look like a thick, dark mixture. This is your magic sauce. Set it next to your cooking area.
- Get your pan ready: Place a large pan on the stove and turn the heat to medium-high. Let it get hot for about 1 minute.
Cooking the Chicken (12 minutes)
- Add oil to hot pan: Carefully add cooking oil to the hot pan. Tilt the pan so the oil spreads everywhere. Wait 30 seconds. You’ll see the oil start to shimmer (move like water). This means it’s ready.
- Add chicken to pan: Gently place seasoned chicken pieces in the hot oil. Don’t move them around yet. Let them cook in one spot for 5 minutes. You’ll see the bottom start to turn golden brown. This is good—it means flavor is building.
- Flip the chicken: Using your spatula or spoon, carefully flip each piece of chicken. Now cook the other side for 4-5 minutes. It should also turn golden brown. The chicken doesn’t need to be fully cooked yet—the sauce will finish cooking it.
- Check if the chicken is mostly cooked: Cut into the thickest piece. Inside, it should be mostly white or light colored, not pink. If it’s still very pink, cook 1-2 minutes more. Once it’s mostly cooked, it’s ready for the sauce.
Making the Dish Come Together (4 minutes)
- Turn the heat down to medium: Before you add the sauce, turn the heat down a little. Medium heat is good now—not high anymore.
- Pour sauce over chicken: Take your small bowl with the magic sauce and carefully pour it all over the chicken in the pan. You might hear a nice sizzle sound. That’s perfect.
- Stir gently: Using your spoon, stir the chicken around so the sauce coats all the pieces. This is the fun part—you’ll start to see the sauce getting darker and stickier.
- Let it cook and bubble: Don’t walk away completely, but let the sauce cook for 2-3 minutes. It should bubble gently (not boil hard). Watch it turn from a thin liquid into a thick, sticky glaze. This is when the magic really happens.

Optional: Make sauce even thicker (skip this if you like thinner sauce)
- If you want really thick, sticky sauce, mix cornstarch with cold water in a small cup. While the sauce is bubbling, slowly pour this mixture in while stirring. Cook for 1 more minute. The sauce will become thick like gravy.
Finishing (1 minute)
- Taste it: Take a small spoon, get a tiny piece of chicken with sauce, and taste it. Does it taste good? Add a tiny pinch of salt if you want it saltier. Add a pinch of pepper if you want more pepper. This is your meal—make it how you like it.
- Get it on plates: Using your spatula, carefully move each piece of chicken to plates or bowls. Pour all the sauce from the pan on top. Don’t leave sauce behind in the pan—put it all on the food.
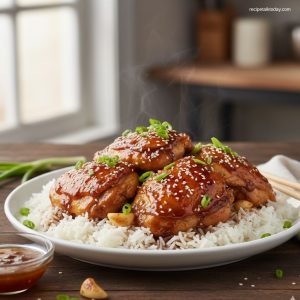
- Make it look nice (optional): Sprinkle a few green onions or sesame seeds on top if you have them. This makes it look prettier, but it tastes good either way.
- Serve right away: Bring it to the table while it’s still hot. Serve with rice, noodles, or bread on the side.
Quick Tips to Make This Even Better
Your chicken will look and taste better if you remember these:
- Dry = golden brown: Always dry the chicken first. Wet chicken steams instead of browning.
- Don’t touch it while it cooks: Let the chicken sit in the pan for 5 minutes before flipping. Moving it too much means it won’t brown nicely.
- Real garlic is better: Fresh garlic cloves taste better than powder, but garlic powder absolutely works.
- Watch the sauce, don’t leave it: The sauce only takes 2-3 minutes to thicken. If you walk away and forget about it, it might burn. Stay close by.
- If sauce is too thin: Cook it a little longer—just 1-2 more minutes. Thin sauce will naturally thicken as it cooks.
- If sauce is too thick: Add a little water or chicken broth, one spoonful at a time, until it’s how you like it.
Variations
These are easy changes you can make. Try them!
Honey Garlic Chicken with Vegetables
Add 200g (2 cups) of broccoli, bell peppers, or green beans to the pan at the same time as the sauce. Let them cook in the sauce too. They get coated with the same delicious glaze.
Honey Garlic Chicken with Less Sweetness
Use 30 ml (2 tablespoons) honey instead of 60 ml (¼ cup). The sauce will be less sweet and more savory. Add extra soy sauce if you like.
Spicy Honey Garlic Chicken
Add ½ teaspoon red pepper flakes to the sauce. Or add a small squirt of sriracha sauce (Thai hot sauce). Your family can handle spice—try it!
Honey Garlic Chicken with Lemon
Add 15 ml (1 tablespoon) fresh lemon juice to the sauce. This makes it brighter and fresher tasting.
Honey Garlic Chicken with Ginger
Add 3g (½ teaspoon) ground ginger powder to the sauce. This makes it taste a little Asian restaurant-style.
Creamy Honey Garlic Chicken
After the sauce is done, add 30 ml (2 tablespoons) of heavy cream or coconut milk. Stir it in. The sauce becomes creamier and richer. Stir for 1 minute but don’t boil hard.
Honey Garlic Thighs Instead of Breasts
Use chicken thighs instead of breasts. They have more flavor and stay juicier. Cook them the same way—maybe 1-2 minutes longer.
Honey Garlic Chicken Over Noodles
Instead of rice, serve this over pasta, egg noodles, or ramen. The sauce coats the noodles beautifully.
Substitutions
Don’t have something? Here’s what to use instead.
For the Chicken
- Chicken thighs: Juicier and forgive overcooking. Cook 1-2 minutes longer.
- Pork chops: Works perfectly. Same cooking time.
- Shrimp: Cook half the time (2-3 minutes total). Shrimp is faster than chicken.
- Tofu: Cut into cubes. Cook gently so it doesn’t break. Same cooking time. Makes a great vegetarian option.
For the Honey
- Brown sugar: Use the same amount. Gives a slightly different but still delicious taste.
- Maple syrup: Same amount. Makes it taste a little woodsy.
- Agave nectar: Same amount. Works just like honey.
For the Soy Sauce
- Tamari: Good gluten-free choice. Use the same amount.
- Coconut aminos: Works if you’re avoiding soy. Same amount.
For the Vinegar
- Lemon juice: Use the same amount. Makes it brighter.
- Apple cider vinegar: Same amount. Works great.
- White vinegar: If you only have this, use slightly less—it’s stronger. Start with 10 ml and taste.
For the Water
- Chicken broth: Makes it tastier. Use the same amount.
- Beef broth: Also works well.
If You Don’t Have Fresh Garlic
- Garlic powder: Use 2g (½ teaspoon) instead of 4 fresh cloves. Stir it in with the other sauce ingredients.
Common Mistakes & How to Fix Them
These mistakes happen to everyone. Here’s what to do.
The Chicken Doesn’t Brown
Why: The pan isn’t hot enough, or the chicken is still wet. Fix: Make sure the pan is really hot before adding chicken. Wait for the oil to shimmer. Dry the chicken better next time.
The Sauce Is Burned or Tastes Bitter
Why: The heat was too high, or you cooked it too long. Fix: Turn the heat down to medium or medium-low. Sauce only needs 2-3 minutes. Start over if it tastes really bad.
The Sauce Is Too Thin
Why: You didn’t cook it long enough. Fix: Let it bubble gently for 2-3 more minutes. Water will cook off and it will thicken naturally. Or add the cornstarch mixture (see instructions).
The Sauce Is Too Thick
Why: You cooked it too long or used too much cornstarch. Fix: Add water or broth, one spoonful at a time, until it’s how you like it.
The Chicken Is Tough
Why: You cooked it too long or at too high heat. Fix: Don’t cook over very high heat. Medium-high to brown, then medium to finish. Use a thermometer if you have one—chicken is done at 74°C (165°F) inside.
The Chicken Sticks to the Pan
Why: Not enough oil, or you tried to move it too early. Fix: Use enough oil. Let chicken cook 4-5 minutes before flipping.
The Sauce Doesn’t Stick to the Chicken
Why: The chicken is too wet, or you didn’t brown it enough. Fix: Dry the chicken first. And brown it properly—this helps the sauce stick better.
I Burned My Tongue on the Hot Sauce
Why: Sauce is very hot right when it comes off the stove. Fix: Wait a minute before tasting. Use a spoon to taste, not your tongue directly.
Storage
How to save leftover chicken for later.
In the Refrigerator
- Put cooled chicken and sauce in a container with a lid
- It will stay good for 3-4 days
- Before eating, warm it on the stove over medium heat, stirring sometimes, for about 5 minutes
- You can also use the microwave—put it in a bowl, cover it loosely, and heat for 1-2 minutes on 50% power
In the Freezer
- Let chicken cool first
- Put it in a freezer bag or container
- It will stay good for 2-3 months
- To eat it: put it in the refrigerator to thaw overnight, then warm on the stove or in the microwave
Best Tip
- Store the chicken and sauce together—they keep each other good
- Eat it within 3-4 days if it’s in the refrigerator. After that, it might taste different or spoil.
Reheating
Ways to warm up leftover honey garlic chicken.
On the Stove (Best Way)
- Put chicken and sauce in a pan over medium heat
- Stir it around for 4-5 minutes until hot
- Add a tiny splash of water if it seems too thick
- Eat when it’s warm throughout
In the Microwave (Fast Way)
- Put chicken and sauce in a microwave-safe bowl
- Don’t cover it completely—leave it a little open so steam can escape
- Heat at 50% power for 1-2 minutes (if you have just a little) or 2-3 minutes (if you have a full serving)
- Stir it halfway through
- Eat when it’s hot
In the Oven (Good for Lots of Chicken)
- Put chicken and sauce in an oven-safe dish with a lid
- Heat oven to 160°C (325°F)
- Cover the dish and put it in for 10-12 minutes
- Chicken should be hot throughout
- This way keeps it from drying out
Important: Heat until it’s hot all the way through—don’t just heat the outside.
FAQs:
Q: Can I use frozen chicken?
A: Thaw it completely first in the refrigerator (overnight is best). Don’t cook from frozen—the cooking time will be wrong, and the chicken might not cook evenly.
Q: My chicken is still pink inside. Is it okay to eat?
A: No. Keep cooking until it’s white or light colored all the way through. Or use a meat thermometer if you have one—it should read 74°C (165°F) inside.
Q: What should I serve this with?
A: Rice (white rice, brown rice, jasmine rice—any kind). Noodles. Bread. Or even on its own with a simple green salad. The sauce is so good it works with almost everything.
Q: Can I double this recipe?
A: Yes! Double everything. You might need a bigger pan. It takes about 5 minutes longer to cook.
Q: Is this good for lunch the next day?
A: Yes! This actually tastes good as leftovers. Many people say it tastes even better the second day. Store in the refrigerator.
Q: What if I don’t have honey?
A: Use brown sugar, maple syrup, or agave nectar instead. Same amount. It tastes slightly different but still delicious.
Q: My family doesn’t like spicy food. Can I make this?
A: Yes! Just don’t add red pepper flakes. This recipe is already good without heat.
Q: Can I make this recipe without soy sauce?
A: It won’t be the same, but you can try tamari or coconut aminos (both are similar to soy sauce). Or use a little extra salt instead.
Q: I only have chicken thighs. Should I use them?
A: Yes! Thighs are actually better for this—they stay juicier and more flavorful. Cook them the same way, maybe 1-2 minutes longer. They’re actually a better choice than chicken breasts.
Q: Is this recipe healthy?
A: This is real food with real ingredients. It’s not heavy or fried. It has protein from chicken and flavor from honey and garlic. It’s much healthier than takeout. Not the lightest thing ever (it has honey and oil), but it’s good real food.
Q: Can my kids eat this?
A: Yes! Kids usually love sweet and sticky chicken. It’s mild and not spicy unless you add hot peppers. Make sure chicken is cooked all the way through.
Q: How much does this serve?
A: 4 people as a main course with rice or noodles. Or 2-3 people with no sides. You can also double it.
Q: Can I make this in the oven instead of on the stove?
A: You could, but it’s easier on the stove. You need to brown the chicken first (get it golden), then add sauce. The stove method is faster and easier.
Q: The recipe looks complicated. Is it really easy?
A: It really is. Try it once and you’ll see. The hardest part is waiting for the sauce to thicken. Everything else is just: brown chicken, add sauce, let it cook. That’s it.
Q: How do I know when the sauce is ready?
A: When it looks sticky and dark, and coats the chicken when you stir it, it’s done. If you’re not sure, cook 1 more minute. You can’t really mess this up.
Q: What does “medium-high heat” mean?
A: On most stoves, there are numbers 1-10, or you turn it to the middle-right area of the dial. If your stove has numbers, use 7 or 8. Not the highest, but pretty hot.
A Final Word from Chef
This recipe is made for real families with real busy lives. You don’t need to be a great cook. You just need 20 minutes and a pan. The rest is simple. We’ve watched hundreds of people make this. Some speak English their whole life. Some don’t. All of them do fine. All of them make something delicious. Your family will ask for seconds. You’ll think about it while you’re at work. Next week, you’ll make it again. That’s when you know a recipe is really good.
Go ahead. Try it tonight. We think you’ll love it.