
By Michael Hayes
Quick Answer: Unplug the cooker and let it cool. Wash the removable inner pot, lid parts, and steam vent with warm soapy water and a soft sponge. Wipe the heating plate and exterior with a damp cloth, never submerge the base, dry every part fully, and follow the manufacturer’s manual.
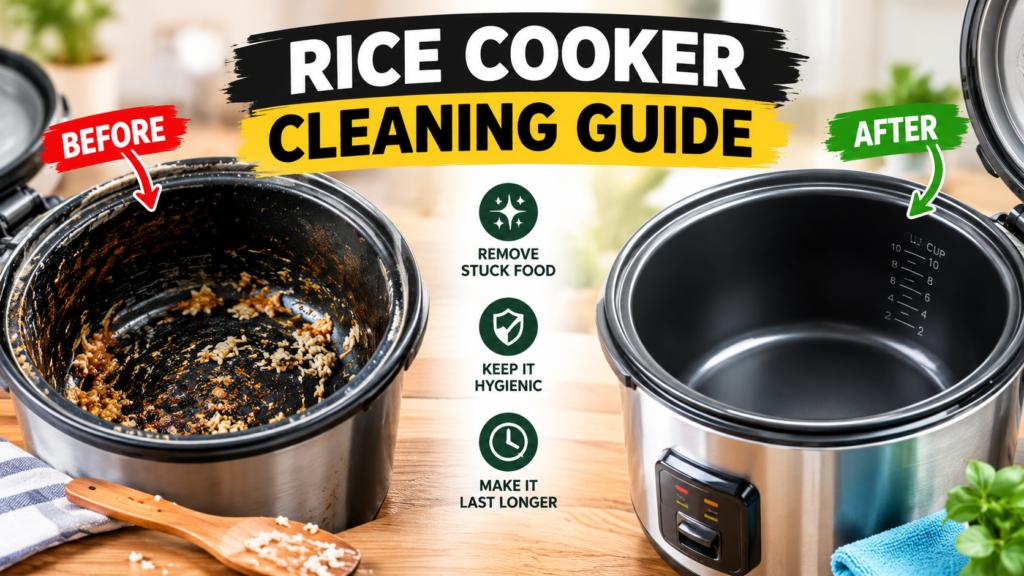
A rice cooker looks simple, but starch, steam, and stuck grains can build up fast. This rice cooker cleaning guide shows you how to clean each part safely, remove odors and stuck rice, and avoid habits that can damage the pot or base. You will also learn what to wash, what to wipe, and when to check your manual.
Please Note: This article is for general educational and buying-guidance purposes only. It does not replace the manufacturer’s official manual, food safety guidance, or professional advice. Materials, specifications, and care instructions can vary by product and should be confirmed with the manufacturer before purchase or use. For product defects, suspected food-safety issues, or injuries such as burns or cuts, contact the manufacturer, a qualified professional, or seek medical help as needed.
How Often Should You Clean a Rice Cooker?
Cleaning falls into two groups: quick care after each use and a deeper check now and then. Rice leaves starch on the pot, and steam leaves moisture around the lid and vent. If those spots stay damp or dirty, odors and sticky residue can build up. A useful rice cooker cleaning guide starts with a schedule you can actually keep.
Choose a quick wash after every use if you cook rice often. Choose a deeper weekly check if you notice cloudy film, a sticky lid, or a smell. Check the manufacturer’s guidance if your model has a steam cap, inner lid, or condensation cup, since parts differ by brand.
Note: Cooked rice should not sit in the cooker for long periods. Food safety guidance generally suggests refrigerating leftovers within about two hours, so see FoodSafety.gov for details.
Cleaning Supplies Compared
Step-by-Step Rice Cooker Cleaning Routine
Follow these steps once the cooker has fully cooled.
Here is the same routine at a glance. Keep this rice cooker cleaning guide flow in mind after any meal.
Practical guide: everyday cleaning flow
→
→
→
→
The order matters. Power comes off first, washable parts come out next, and the base is only wiped. Drying last helps limit leftover moisture.
How to Clean Each Part of a Rice Cooker
Any good rice cooker cleaning guide should cover every part, not only the pot. Each piece collects a different kind of mess.
Most inner pots lift out and are washed by hand. Many have a non-stick coating, so a soft sponge is the safer choice. Check the manual before using a dishwasher.
Some lids lift off, and some have a removable inner plate. Wash these with warm soapy water because starch and splatter collect here. Dry the seal area well.
Dried starch can clog small openings and affect how steam escapes. Rinse removable caps and use a soft brush on tiny gaps. Never poke sharp objects into vents.
Wipe the plate under the pot with a damp cloth only. Stuck grains here can keep the pot from sitting flat. Always wait until it is unplugged and cool.
Tip: Rinse the inner pot soon after serving, while it is only warm. Starch washes off far more easily before it dries into a hard layer.
Common Problems and Likely Causes
To keep every part on your radar, use this checklist dashboard. It splits care into two simple rhythms.
Practical guide: care checklist
☐ Unplug and cool
☐ Wash inner pot
☐ Wipe lid and rim
☐ Air dry parts
☐ Rinse vent or steam cap
☐ Check seal area
☐ Wipe heating plate
☐ Inspect cord and parts
Daily tasks are quick and prevent most buildup. The weekly list catches hidden spots that are easy to forget.
Removing Stuck Rice, Odors, and Stains
Stubborn spots can usually be handled without harsh tools. Start with the mildest method and move up only if needed.
Use this decision path when rice or odors will not come off.
Practical guide: troubleshooting path
The path ends with the manufacturer, not stronger scrubbing. If a coating flakes or peels, stopping use and asking the maker is the careful choice.
Warning: Never submerge the base, control panel, or cord in water. Do not use steel wool, harsh oven cleaners, or sharp tools on the pot or vents. Stop using a cooker with a damaged cord or cracked part.
Safer Practices vs Risky Practices
Common Rice Cooker Cleaning Mistakes
A rice cooker cleaning guide is only useful if you avoid the common slip-ups. These habits are easy to fix and need no special tools.
Mistakes vs Better Choices
Choosing Cleaning Tools That Protect Your Cooker
The right tools make this job easier, and a rice cooker cleaning guide is more useful when it matches your pot’s surface. Check the pot’s material before buying anything.
Which Cleaning Approach Fits Your Inner Pot?
This dashboard shows which common tool suits which part.
Practical guide: tool fit
Gentler tools fit daily use, while pastes are better saved for occasional spots. Match the tool to the part, not the other way around.
What to Prioritize on Busy Days
Short on time? This chart shows a typical routine priority, not lab data.
Typical routine priority (practical guide, not statistical data)
These bars are only a practical guide to help you choose what comes first, not measured data. Safety and drying come before extras.
Safety and When to Get Help
Safety Note: Rice cookers use electricity and heat. Do not open the base to clean inside, and do not attempt DIY repairs on cords, switches, or heating parts. If you see a frayed cord or smell burning plastic, unplug the cooker if it is safe to do so and stop using it. The U.S. Consumer Product Safety Commission shares product safety and recall information.
When to Contact the Manufacturer or a Professional: Contact the manufacturer if the non-stick coating peels, a lid part cracks, or a vent will not clear. Use a qualified repair professional or replace the unit for electrical problems. Seek medical help for serious burns.
This article may contain affiliate links. If you buy through these links, we may earn a small commission at no extra cost to you. We only mention products that fit the topic and recommend checking current specs and care instructions directly with the manufacturer.
Helpful Cleaning Tools
Soft sponges can make daily washing of a non-stick inner pot easier. Many home cooks find them convenient.
A small soft brush may help clear starch from vent and lid gaps. Make sure it suits your cooker’s parts.
Rice Cooker Cleaning FAQs
Can I put a rice cooker inner pot in the dishwasher?
Some models allow it, but many do not. Check the manual first, because heat and harsh detergents can wear non-stick coatings.
How do I remove stuck rice from a rice cooker?
Unplug and cool the cooker, then soak the pot in warm soapy water for 10 to 15 minutes. Wipe gently with a soft sponge.
How do I get the smell out of a rice cooker?
Wash and fully dry all removable parts, including the lid and vent cap. A gentle baking soda paste may help if a smell lingers.
Can I wash the whole rice cooker in water?
No. Wash only the removable parts. Wipe the base and exterior with a damp cloth, and never submerge the base or cord.
Is it safe to use vinegar in a rice cooker?
Some manuals suggest it for mineral film, while others advise against it. Check your manufacturer’s instructions before using it.
When should I stop using my rice cooker?
Stop if the cord is damaged, a part cracks, the coating peels, or you smell burning. Contact the manufacturer for guidance.
Final Thoughts
Keeping a rice cooker clean takes only a few minutes when you rinse early, wipe gently, and dry fully. Use this rice cooker cleaning guide as a simple routine, but always follow your manufacturer’s manual for your model. Follow food-safety guidance for leftover rice, and seek professional or medical help for electrical issues or burns.
