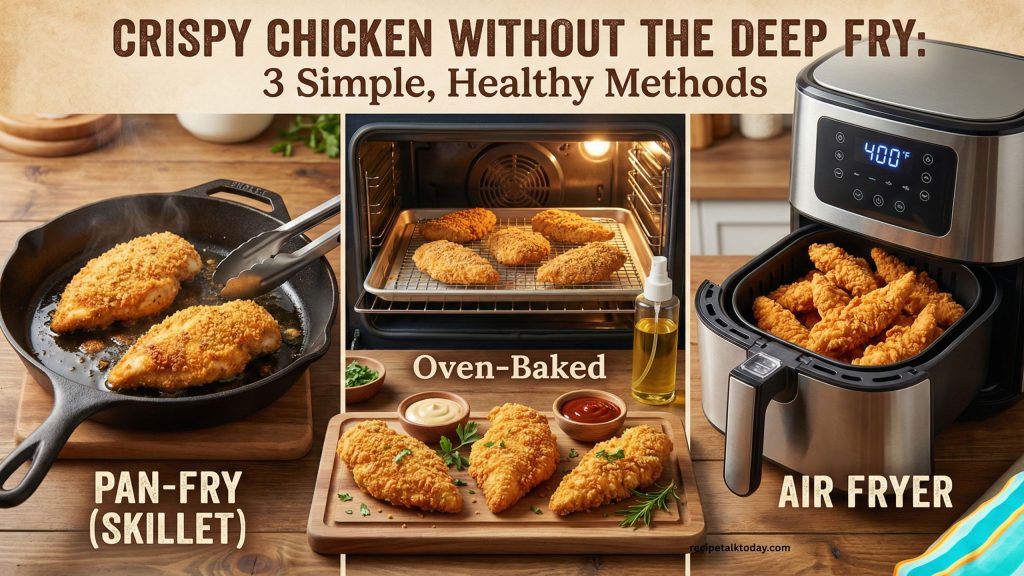
Craving restaurant-quality crispy chicken without the mess and oil of deep frying? Discover three simple, health-conscious methods that deliver that perfect golden-brown crunch using just your skillet, oven, or air fryer.
Why This Recipe Works
Most home cooks avoid making crispy chicken because deep frying seems complicated, messy, and unhealthy. This guide changes that by revealing three proven techniques for making crispy chicken without deep fry methods. The secret lies in proper preparation, coating chemistry, and controlled heat rather than gallons of oil. Whether you choose pan-frying (using just 60-90 ml oil), baking (using only 1-2 tablespoons oil), or air frying (using minimal spray), each method produces that coveted golden, crunchy exterior while keeping the meat juicy and tender. These pan-fried chicken recipes and no-fry fried chicken alternatives have become increasingly popular because they deliver restaurant-style results with easier cleanup, less food waste, and reduced fat content. You’ll learn the formula for crispy homemade chicken that rivals takeout fried chicken—without the guilt or hassle.
Ingredients
Core Chicken & Marinade (For Any Method)
- 4 boneless, skinless chicken breasts (600–700g / 21–24 oz) OR 800g (1.75 lbs) bone-in thighs or drumsticks
- 45 ml (3 tablespoons) vegetable oil
- 1 large egg
- 5g (1 teaspoon) salt
- 2g (¼ teaspoon) black pepper
Dry Batter Coating (For Pan-Fry & Oven Methods)
- 100g (¾ cup) all-purpose flour or cornstarch
- 30g (¼ cup) cornstarch (additional, for extra crispiness)
- 50g (½ cup) grated Parmesan cheese (optional but recommended)
- 1 teaspoon Italian seasoning (2g)
- ½ teaspoon paprika (1g)
- ½ teaspoon garlic powder (1g)
- ¼ teaspoon cayenne pepper (optional, for heat)
- 3g (½ teaspoon) salt
- 1g (¼ teaspoon) black pepper
Alternative: Panko Breadcrumb Coating
- 100g (1 cup) panko breadcrumbs
- 50g (½ cup) grated Parmesan cheese
- 2 tablespoons all-purpose flour
- 2g (½ teaspoon) salt
- 1g (¼ teaspoon) black pepper
- 1 teaspoon dried Italian seasoning
Alternative: Baking Powder Method (Oven/Air Fryer Only)
- 15g (1 tablespoon) baking powder (aluminum-free preferred)
- 3g (½ teaspoon) salt
- 2g (¼ teaspoon) black pepper
- 1 teaspoon paprika or garlic powder (optional)
For Dipping & Coating
- 1 large egg (30g)
- 30 ml (2 tablespoons) milk or water
- Oil spray or brush (for air fryer method)
Equipment Needed
For Pan-Frying Method:
- Large cast iron or stainless steel skillet (12-inch / 30cm ideal)
- Shallow bowls or plates (for coating mixtures)
- Tongs or spatula
- Paper towels
- Instant-read thermometer
- Heavy-bottomed saucepan or Dutch oven (alternative)
For Oven-Baking Method:
- Large baking sheet
- Oven-safe wire rack or cooling rack
- Aluminum foil
- Shallow bowls (for coatings)
- Oil spray bottle or brush
- Instant-read thermometer
For Air Fryer Method:
- Air fryer basket or grill plate
- Oil spray bottle or brush
- Instant-read thermometer
Universal Equipment:
- Sharp chef’s knife
- Cutting board
- Paper towels
- Shallow dishes for coatings
- Instant-read meat thermometer
Method 1: Pan-Fried Crispy Chicken (Minimal Oil, Maximum Flavor)
Prep Work (5 minutes)
Prepare chicken: Pat chicken completely dry with paper towels. Moisture prevents browning. For even cooking, butterfly thick breasts or pound to uniform 1.5cm (¾ inch) thickness. Cut into 2.5cm (1-inch) pieces if using thighs or drumsticks.
Make egg coating: In a shallow bowl, whisk egg with 15 ml (1 tablespoon) milk, salt (2g / ¼ teaspoon), and black pepper (1g / pinch) until well combined.
Mix flour coating: In another shallow bowl or plate, combine flour, cornstarch, Parmesan cheese, Italian seasoning, paprika, garlic powder, salt, and black pepper. Mix thoroughly until evenly distributed. Break up any clumps.
Prepare your workspace: Arrange egg bowl, flour bowl, and a clean plate in a line. Have paper towels and your skillet nearby for efficient assembly-line coating.
Cooking (12–15 minutes)
Heat the skillet: Place cast iron skillet over medium-high heat. Add 60 ml (¼ cup) vegetable oil and let it heat for 2 minutes until it shimmers noticeably. Test readiness by dropping a small amount of flour mixture into the oil—it should sizzle immediately.
Coat the chicken: Working with one piece at a time, dip chicken into egg mixture, coating all sides. Let excess drip off (about 2 seconds). Press firmly into flour mixture, coating completely on both sides. Shake off excess coating.
Pan-fry first batch: Carefully place coated pieces into hot oil. Avoid crowding—pieces should not touch. Work in batches if necessary. Cook for 5–7 minutes without moving them until golden brown crust forms on the bottom.
Flip and cook second side: Using tongs, flip carefully. Cook for 4–6 minutes on the second side until golden brown and internal temperature reaches 74°C (165°F) when tested with instant-read thermometer in the thickest part.
Remove and cool: Transfer cooked chicken to a paper-towel-lined plate to drain excess oil. Let rest for 1–2 minutes—this allows the coating to set and stay crispy even when sauced later.
Repeat if needed: If making multiple batches, maintain oil temperature between batches. Add additional oil (15 ml / 1 tablespoon) if the pan looks dry before adding the next batch.
Method 2: Oven-Baked Crispy Chicken (Hands-Off, Healthy)
Prep Work (5 minutes)
Prepare oven and rack: Preheat oven to 200°C (400°F). Line a large baking sheet with aluminum foil. Place an oven-safe wire rack on top. Generously coat the rack with oil spray or brush with 15 ml (1 tablespoon) oil.
Prepare chicken: Pat chicken dry thoroughly with paper towels. Cut into strips or uniform pieces about 5cm (2 inches) wide, or butterfly breasts to ½ inch (1.25cm) thickness.
Make egg mixture: Whisk 2 large eggs in a shallow bowl with 30 ml (2 tablespoons) milk, 3g (½ teaspoon) salt, and 1g (¼ teaspoon) black pepper.
Mix breadcrumb coating: In another shallow bowl, combine panko breadcrumbs, grated Parmesan, flour, salt, pepper, and Italian seasoning. Mix until evenly distributed.
Baking (35–45 minutes)
Coat the chicken: Dip each piece into egg mixture, then press firmly into breadcrumb mixture, coating thoroughly. Shake off excess.
Arrange on rack: Place coated chicken on the prepared wire rack, ensuring pieces don’t overlap or touch. Leaving space allows hot air to circulate evenly, creating an all-around crispy coating.
Oil spray: Generously spray the top side of each piece with oil spray (or brush with 30 ml / 2 tablespoons oil total). This is crucial—the oil creates the golden, crispy exterior through browning.
Bake: Place in preheated oven for 35–45 minutes until chicken is deep golden brown and internal temperature reaches 74°C (165°F). Thicker pieces may require the full 45 minutes.
Check for crispiness: For extra crispiness, increase oven temperature to 220°C (425°F) for the final 5 minutes. Watch carefully to prevent burning.
Cool briefly: Remove from oven and let rest for 2–3 minutes on the rack. This allows the coating to crisp up further as it cools.
Method 3: Air Fryer Crispy Chicken (Fastest Method, Minimal Oil)
Prep Work (3 minutes)
Preheat air fryer: Set to 200°C (400°F) and preheat for 3 minutes.
Prepare chicken: Pat completely dry. For even cooking, cut into 2.5–5cm (1–2 inch) pieces. Avoid overcrowding by cutting uniform sizes.
Make coatings: Prepare egg mixture (as in Method 2, step 13) and breadcrumb or flour coating (as in Method 1, step 3).
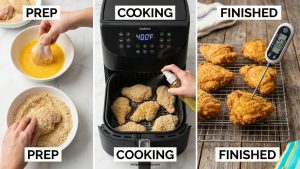
Air Frying (20–25 minutes)
Coat the chicken: Dip each piece in egg mixture, then press into flour or breadcrumb coating. Shake off excess gently.
Prepare basket: Lightly spray or brush the air fryer basket with oil. Arrange coated chicken in a single layer without overlapping. Pieces should not touch for optimal air circulation.
Spray with oil: Lightly spray the top surface of each piece with oil spray. This is essential—the oil creates the crispy exterior. Don’t skip this step.
Air fry: Cook at 200°C (400°F) for 12–15 minutes (for boneless breasts) or 15–20 minutes (for bone-in thighs/drumsticks). Shake the basket or flip pieces halfway through for even browning.
Check temperature: Internal temperature should reach 74°C (165°F). Most air fryer models heat so efficiently that you’ll achieve a perfectly crispy exterior with a juicy, tender interior.
Cool on rack: Transfer to a wire rack or paper towels. The chicken will crisp up even more as it cools.
Alternative: 2-Ingredient Crispy Chicken (Simplest Method)
For Oven or Air Fryer
- Simple coating: Pat chicken dry. Combine baking powder (15g / 1 tablespoon, aluminum-free), salt (5g / 1 teaspoon), and black pepper (2g / ¼ teaspoon) in a shallow bowl. Optional: add 1 teaspoon paprika or garlic powder for flavor.
- Coat chicken: Toss chicken pieces in baking powder mixture until completely coated. The baking powder raises pH and promotes browning and crispiness.
- Arrange and cook: Place on an oiled baking sheet or air fryer basket. Spray lightly with oil. Bake at 200°C (400°F) for 40–45 minutes (oven) or air fry at 200°C for 20–25 minutes (air fryer) until internal temperature reaches 74°C (165°F).
Why this works: Baking powder alkalizes the chicken skin surface, promoting enzymatic browning and creating a crispy exterior without any wet batter.
Variations
Crispy Garlic Parmesan Chicken
Add 2 tablespoons minced garlic and 75g (¾ cup) additional grated Parmesan to the coating mixture. Increases umami and savory depth. Works beautifully for all three methods.
Spicy Crispy Chicken
Add ½ teaspoon cayenne pepper, 1 teaspoon smoked paprika, and ½ teaspoon ground black pepper to coating for heat. Serve with cooling ranch or yogurt sauce.
Herb-Crusted Version
Mix coating with 2 tablespoons fresh chopped parsley, 1 tablespoon fresh chopped basil, and 1 tablespoon fresh chopped thyme (or 2 teaspoons dried herbs). Creates a vibrant, aromatic crust.
Asian-Inspired Crispy Chicken
Add 1 tablespoon sesame seeds, 1 teaspoon ground ginger, and ½ teaspoon white pepper to flour coating. Serve with sweet and sour sauce, soy-ginger glaze, or sriracha mayo.
Cajun Spiced Crispy Chicken
Add 1 teaspoon Cajun seasoning (or combine ½ teaspoon paprika + ¼ teaspoon cayenne + ¼ teaspoon garlic powder + ¼ teaspoon onion powder) to coating. Perfect for Louisiana-style meals.
Crispy Chicken Tenders for Kids
Cut chicken into thin strips (5–7cm / 2–3 inches long). Reduce cooking time slightly. Coat with panko + Parmesan mix. Kids love the finger-food format and familiar shape.
Crispy Chicken Thighs (Most Forgiving)
Use bone-in, skin-on chicken thighs instead of breasts. Place skin-side down on wire rack. The skin becomes incredibly crispy, and dark meat stays juicier longer. Extend cooking time by 5–10 minutes.
Ranch Crusted Crispy Chicken
Add 30g (¼ cup) powdered ranch seasoning mix to the flour coating. Pairs perfectly with ranch dipping sauce.
Substitutions
For the Protein
- Bone-in chicken: Thighs, drumsticks, or wings work beautifully. Skin crisps up gorgeously. Add 5–10 minutes to cooking time depending on size.
- Turkey breast: Substitute with thin-cut turkey cutlets or tenders. Follow the same cooking times as chicken breasts. Watch carefully as turkey can dry out slightly faster.
- Chicken tenders/tenderloins: Cook 2–3 minutes less per side as they’re naturally thinner and cook quickly.
- Pork cutlets or chops: Pound thin (6mm / ¼ inch) and follow exact timing as chicken breasts. Results are equally delicious.
For the Coating (Flour-Based)
- Cornstarch-only coating: Use 100g (¾ cup) cornstarch instead of flour + cornstarch mix. Creates an exceptionally crispy, glass-like crust. Use 1:1 ratio.
- Panko breadcrumbs: Mix 100g panko + 25g all-purpose flour + seasonings. Creates maximum crunch and golden color.
- Gluten-free flour blend: Use 1:1 ratio of gluten-free all-purpose flour. Add extra 15g (1 tablespoon) cornstarch for crispiness.
- Almond flour: Mix 50g almond flour + 50g cornstarch + seasonings. Creates a different (slightly nutty) flavor and unique texture. Lower-carb option.
- Crushed crackers or cereal: Finely crush Ritz crackers, panko, or plain cereal. Combine with 25g all-purpose flour for structure. Creates unique flavors based on cracker choice.
For the Batter/Coating Liquid
- Buttermilk: Replace milk with 45 ml (3 tablespoons) buttermilk for tangier flavor and slightly more tender chicken. Creates a slightly different crust texture.
- Greek yogurt: Mix 45ml (3 tablespoons) Greek yogurt + 15ml (1 tablespoon) water. Creates a thicker, more adhesive coating that sticks better.
- Sparkling water or club soda: Use instead of milk for an extra-crispy, almost tempura-like coating. The carbonation creates tiny air pockets.
- Mayo: Mix 30g (2 tablespoons) mayo + 15ml (1 tablespoon) water. Creates a richer, more golden crust with extra moisture.
For Oil
- Avocado oil: High smoke point, mild flavor, very healthy option. 1:1 substitution.
- Peanut oil: High smoke point, neutral flavor, slightly nutty undertones. Works beautifully for all methods.
- Coconut oil: Use refined (not virgin) for neutral flavor. Creates unique golden color. 1:1 substitution.
- Olive oil: Use only for oven-baking method (lower smoke point). Not ideal for pan-frying due to lower heat tolerance.
- Cooking spray: For air fryer only. Allows minimal-oil cooking. Creates similar results with less oil overall.
For Seasonings
- No seasoning: Use plain flour + salt + pepper only for a classic, neutral backdrop. Perfect for pairing with sauces.
- Italian herb blend: Replace individual herbs with 2 teaspoons pre-mixed Italian seasoning for convenience.
- Taco seasoning: Add 1–2 tablespoons taco seasoning to coating for Mexican-inspired crispy chicken.
- Everything bagel seasoning: Sprinkle over coating for trendy, complex flavor. Use sparingly as it’s potent.
- Fish sauce or soy sauce: Add 5ml (1 teaspoon) to egg mixture for umami depth (strong flavor—use cautiously).
For Serving Sides
- Dipping sauces: Ranch, honey mustard, BBQ, sweet and sour, sriracha mayo, hot sauce, teriyaki, or lemon aioli
- Grain sides: Jasmine rice, basmati rice, wild rice pilaf, polenta, couscous, or quinoa
- Vegetable sides: Roasted broccoli, steamed green beans, grilled asparagus, roasted Brussels sprouts, or coleslaw
- Carb sides: Mashed potatoes, sweet potato fries, French fries, waffle fries, or pasta
Mistakes to Avoid
1. Wet Chicken from the Start
Moisture is the enemy of crispiness. Always pat chicken completely dry with paper towels before coating. Any remaining moisture converts to steam, creating soggy coating instead of crispy crust.
2. Skipping the Oil or Using Too Little (Air Fryer & Oven)
Many people skip oil to reduce calories, but oil is essential for browning and crispiness. Without it, you get baked chicken, not crispy chicken. Use adequate oil spray or brush—the coating needs this fat to achieve that golden, crunchy exterior.
3. Uneven Chicken Thickness
Thick pieces take longer to cook, causing thin pieces to overcook or burn. Spend 1 minute to butterfly or pound chicken to uniform thickness (approximately 1.5cm / ¾ inch for breasts).
4. Crowding the Pan, Oven, or Air Fryer
This is a critical mistake. Crowding lowers cooking temperature, creating steam instead of dry heat. Steam softens the coating rather than crisping it. Always leave space between pieces for air circulation. Cook in batches if necessary.
5. Low Heat (Pan-Frying)
Medium-high heat is essential for proper browning. Low or medium heat creates greasy, pale, soft-coated chicken. Test oil readiness by observing shimmer or doing the flour-sizzle test before adding chicken.
6. Moving Chicken Too Early (Pan-Frying)
Resist the urge to flip before the crust sets (minimum 5–7 minutes). Moving prematurely prevents crust formation and can tear the coating. Set a timer and walk away.
7. Using Room-Temperature or Cold Oil
Cold oil won’t brown the coating properly. Always preheat the pan for 2 full minutes (pan-frying) or follow preheating instructions (air fryer/oven) before adding chicken.
8. Skipping Instant-Read Thermometer Check
Relying on appearance alone risks undercooked or overcooked chicken. Always verify internal temperature reaches minimum 74°C (165°F) in the thickest part. This ensures food safety and prevents guesswork.
9. Storing Hot Chicken Without Cooling
Steaming trapped inside containers softens the crispy coating. Always let chicken cool on a wire rack or paper towels before storing. This allows steam to escape and the coating to firm up.
10. Overcooking Boneless Chicken Breasts
Lean white meat dries out quickly at high temperatures. Pan-fry breasts for only 5–7 minutes per side maximum. Bone-in thighs are much more forgiving because dark meat has higher fat content.
11. Reheating in Microwave Without Precautions
Microwaves introduce steam, destroying crispiness. If you must microwave, use 50% power for short intervals and place on a paper towel (not covered). Better option: reheat in a 160°C (325°F) oven on a wire rack for 5–10 minutes.
12. Forgetting to Let Coating Set Before Saucing
If you immediately pour sauce over hot crispy chicken, the heat and moisture will soften the coating. Wait 1–2 minutes, then add sauce. Or serve sauce on the side for dipping to maintain crispiness.
Storage
Refrigerator (Best Short-Term)
- Store cooled crispy chicken in an airtight glass container for 3–4 days
- Keep chicken and any sauce separate to maintain crispiness
- Layer with parchment paper between pieces to prevent sticking
- Store in the coldest part of your refrigerator (back, not door)
Freezer (Best Long-Term)
- Freeze cooled, completely cooked chicken for 2–3 months in a freezer-safe container or freezer bag
- Lay flat to freeze first, then stack after freezing to save space
- Separate pieces with parchment paper to prevent freezing together
- Label with date for easy reference
- Thaw overnight in refrigerator before reheating
For Maximum Crispiness Storage
- Store on a plate lined with paper towels (absorbs any residual moisture)
- Place another paper towel on top
- Cover loosely with a breathable lid or cloth (not airtight, which traps steam)
- Use within 1–2 days for best texture
Sauce Storage (if Separate)
- Store sauce in airtight glass container for 5–6 days
- Freeze sauce separately for up to 3 months
- Thaw and reheat gently before serving with reheated chicken
Reheating
Oven Method (Recommended—Preserves Crispiness)
- Preheat oven to 160°C (325°F)
- Place chicken on a wire rack set over a baking sheet
- Bake uncovered for 8–12 minutes until heated through to 74°C (165°F) internally
- Increase temperature to 190°C (375°F) for final 2 minutes for extra crispiness if desired
Result: Coating stays crispy, chicken stays moist. Takes 15 minutes total.
Air Fryer Method (Quickest, Crispiest)
- Preheat air fryer to 180°C (350°F) for 2 minutes
- Arrange chicken in basket without overlapping
- Air fry for 5–8 minutes until heated through
- Internal temperature should reach 74°C (165°F)
Result: Coating recrisps beautifully. Takes 10 minutes total.
Stovetop Method (If Oven Unavailable)
- Heat a skillet over medium heat (not high, to avoid burning coating)
- Add 1 tablespoon oil to pan
- Place chicken pieces in pan and heat for 3–5 minutes per side, turning occasionally
- Check internal temperature reaches 74°C (165°F)
Result: Good crispiness retention. Takes 10 minutes total.
Microwave Method (Last Resort)
- Place chicken on a microwave-safe plate lined with paper towels
- Cover loosely with a paper towel (not a lid)
- Microwave at 50% power for 1–2 minutes (for 2–3 pieces) or 2–3 minutes (for 4–6 pieces)
- Check internal temperature and add 30-second intervals if needed
Result: Coating softens slightly but chicken heats quickly. Takes 3–5 minutes total. Not ideal for maintaining crispiness.
Do Not Refreeze
Once thawed, do not refreeze. Cook thawed chicken within 24 hours for food safety.
Frequently Asked Questions
Q: Which method is fastest?
A: Air fryer is fastest (20–25 minutes total including preheating). Pan-frying is second (20 minutes). Oven-baking is slowest (40–45 minutes) but completely hands-off.
Q: Why isn’t my chicken crispy?
A: Most common causes: (1) wet chicken—pat dry thoroughly; (2) crowding—give pieces space; (3) inadequate oil—use enough for browning; (4) low heat—ensure proper preheating; (5) too much handling—don’t flip constantly.
Q: Can I use boneless chicken thighs?
A: Yes! Thighs are juicier and more forgiving than breasts. Extend cooking time by 2–3 minutes. Dark meat’s higher fat content keeps it tender even if slightly overcooked.
Q: Can I make this gluten-free?
A: Yes. Use cornstarch (or gluten-free flour blend) instead of all-purpose flour. Results are equally crispy. Panko also comes in gluten-free versions.
Q: What’s the difference between this and takeout fried chicken?
A: Takeout is deep-fried (submerged in 350°F oil), while these methods use minimal oil or air circulation. Takeout typically has more oil and saturated fat, but slightly more crispiness in some cases. These methods deliver 90% of the crunch with significantly less oil.
Q: Can I prepare and coat chicken ahead of time?
A: Yes. Coat chicken up to 4 hours ahead, store covered in refrigerator, then cook fresh for the crispiest results. Coating becomes slightly damp if stored too long (over 6 hours), affecting final crispiness.
Q: Is air fryer crispy chicken as crispy as pan-fried?
A: Yes, equally crispy with proper technique. The key is adequate oil spray and not overcrowding. Air fryer circulates hot air at high speed, creating similar Maillard browning to pan-frying.