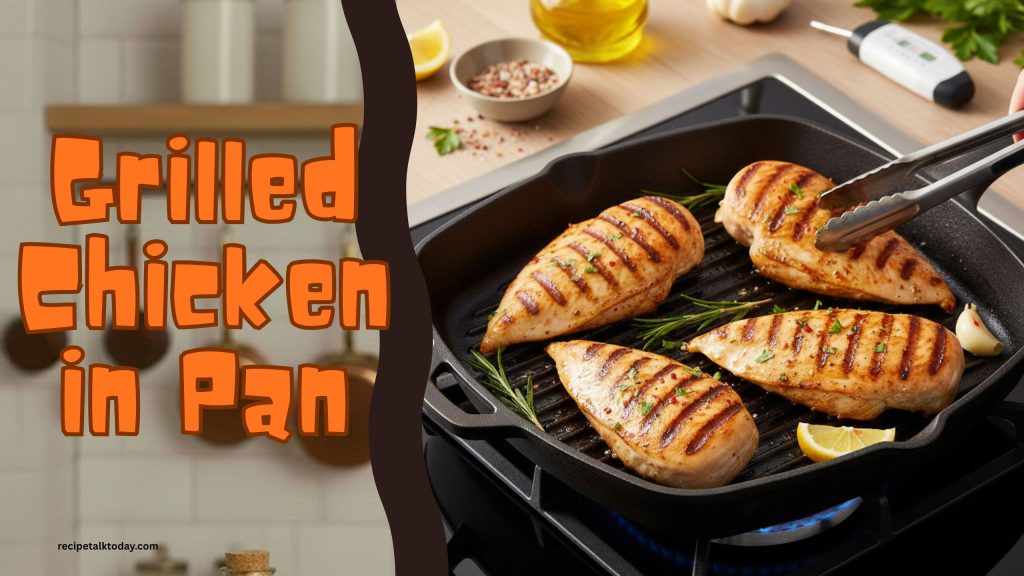
You don’t need an outdoor grill to get restaurant-quality grilled chicken with perfect marks and juicy meat. This indoor grill pan method delivers in just 15 minutes using your stovetop.
Why This Works
Grilled chicken in a pan is the answer for year-round chicken cooking. Bad weather? No problem. No backyard grill? Not an issue. You get all the benefits of outdoor grilling—beautiful char marks, smoky flavor, juicy meat—in your regular kitchen.
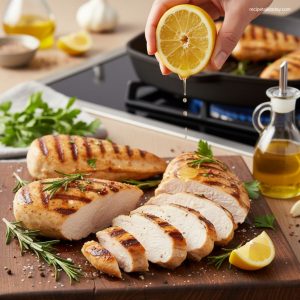
The science is simple. A hot grill pan creates high heat that sears the outside while keeping moisture locked inside. The ridged surface mimics outdoor grill grates, creating those beautiful diagonal marks people love. The whole process takes 15 minutes from cold pan to finished chicken.
This method is perfect for meal prep. Make extra chicken and use it all week in salads, sandwiches, wraps, or grain bowls. The chicken stays tender and tasty even after days in the fridge.
Ingredients
Serves 4 people (15 minutes total)
For the Chicken
- 600g (1.3 lbs / about 4 medium) boneless, skinless chicken breasts OR boneless thighs
- 15 ml (1 tablespoon) high-heat oil (avocado, vegetable, or canola)
- 3g (½ teaspoon) salt
- 2g (¼ teaspoon) black pepper
Optional Seasonings (Pick One Combination)
Simple & Classic:
- 2g (½ teaspoon) garlic powder
- 2g (½ teaspoon) dried oregano
- 1g (¼ teaspoon) paprika
Italian Herb:
- 2g (½ teaspoon) dried basil
- 2g (½ teaspoon) dried oregano
- 2g (½ teaspoon) garlic powder
Mediterranean:
- 15 ml (1 tablespoon) fresh lemon juice
- 2g (½ teaspoon) oregano
- 1 clove garlic, minced
Spicy:
- 2g (½ teaspoon) smoked paprika
- 1g (¼ teaspoon) cayenne pepper
- 1g (¼ teaspoon) black pepper
Equipment Needed
- 1 grill pan or cast iron skillet with ridges
- 1 large plate
- Tongs or spatula
- Paper towels
- Meat thermometer (optional but helpful)
- Small bowl for mixing seasonings
Step-by-Step Instructions
Prep (3 minutes)
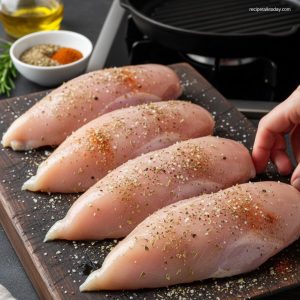
- Prepare the chicken: Pat chicken completely dry with paper towels. Dry surfaces brown better and get better grill marks.
- Even thickness: Using a meat mallet or rolling pin, gently pound chicken to even thickness (about 1.5cm / ¾ inch). This ensures even cooking. No thin edges that dry out and thick centers that stay raw.
- Mix seasonings: In a small bowl, combine your chosen seasonings with salt and black pepper.
- Season the chicken: Rub oil all over both sides of each chicken piece. Sprinkle your seasoning mix evenly on both sides. Use your hands to press it in a little.
Cook (10-12 minutes)
- Preheat the pan: Place your grill pan over medium-high heat. Let it heat for 3-5 minutes. You want it really hot. Drop a tiny bit of water on it—if it sizzles and disappears, it’s ready.
- Brush with oil: Lightly brush or spray the hot grill pan with a bit of oil. This prevents sticking.
- Place chicken: Carefully lay chicken pieces on the hot pan. They should sizzle immediately—that’s the sound of good cooking happening. Don’t crowd the pan. Leave space between pieces.
- First side (5-6 minutes): Do NOT move the chicken. Just let it sit. You’ll see the color changing from light to golden brown. Watch for those beautiful diagonal grill marks to form. This takes patience but it’s worth it. Around 5 minutes, check underneath—if it releases easily from the pan when you lift it slightly, it’s ready to flip.
- Flip and second side (4-5 minutes): Using tongs, flip each piece. Now cook the other side for 4-5 minutes. It will cook slightly faster than the first side because the pan is already hot.
- Check for doneness: Cut into the thickest piece. Inside should be white or light pink, not dark pink. Better yet, use a meat thermometer—chicken is done at 74°C (165°F) internal temperature. If using a thermometer, remove at 160°F and let carryover heat finish it to 165°F. This keeps it juicier.
- Rest the chicken: Transfer to a plate. Let it rest for 3-5 minutes. This is important. Resting lets juices settle back into the meat, keeping it tender and juicy.
Serve (2 minutes)
- Slice if desired: Cut chicken against the grain for more tender pieces.
- Optional finishing touches: Fresh lemon juice. Fresh herbs. A drizzle of olive oil. Whatever sounds good.
Real Tips That Work
- Use thighs if you can: Thighs have more flavor and forgive overcooking way better than breasts. They’re a beginner’s best friend. Cook 1-2 minutes longer.
- Don’t move the chicken: Resist the urge to flip or move it around. Let it sit for the full 5-6 minutes. Moving it stops grill marks from forming.
- High heat is your friend: Medium-high to high heat is what creates beautiful browning and grill marks. Low heat = steamed chicken. Not what we want.
- Preheat properly: A cold pan gives you no marks and steamed chicken. Wait 3-5 minutes. Hot pan = good browning.
- Pat dry before seasoning: Moisture = no browning. Get it really dry. Use lots of paper towels.
- If it sticks, wait longer: If chicken is sticking to the pan, it’s not ready to flip yet. Give it another minute. When the proteins set, they release naturally.
- Use a meat thermometer: Take the guesswork out. Chicken is safe at 74°C (165°F). Don’t cook higher—it starts drying out.
Easy Variations
Try these without changing the basic method:
- With garlic butter sauce: After cooking, add 15g (1 tablespoon) butter and 2 minced garlic cloves to the hot pan. Spoon over chicken.
- Lemon herb grilled chicken: Add 15 ml (1 tablespoon) fresh lemon juice during last minute of cooking.
- Mediterranean style: Cook with oregano seasoning. Serve with a fresh salad.
- Spicy grilled chicken: Add cayenne pepper to seasoning mix.
If you’re looking for ways to use your grilled chicken, try pairing it with our Simple Chicken Curry sauce for a quick curry bowl, or add it to Honey Garlic Chicken Quick sauce for something sweet and sticky.
Simple Swaps
Don’t have what you need? Use this instead:
| Need | Use This |
|---|---|
| Grill pan | Cast iron skillet (won’t have marks but tastes great) |
| Avocado oil | Vegetable or canola oil |
| Chicken breasts | Boneless thighs (better flavor, juicier) |
| Fresh herbs | Dried herbs (use half the amount) |
| Lemon juice | Lime juice or vinegar |
Storage & Leftovers
Grilled chicken keeps great and tastes perfect all week:
Refrigerator
- Cool first, then store in airtight container
- Lasts 4-5 days
- Eat hot or cold
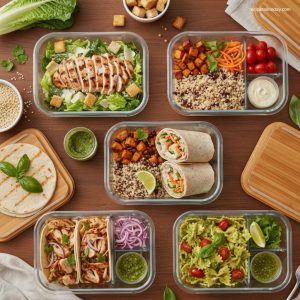
- Perfect for salads, sandwiches, wraps, grain bowls
Freezer
- Cool completely, then freeze in container or bag
- Lasts 2-3 months
- Thaw overnight in fridge
- Reheat gently if serving hot
Make-Ahead Tip
Cook extra grilled chicken on Sunday. Use it throughout the week. Saves time and makes weeknight meals super easy.
5 Quick Questions
Q: Why aren’t I getting grill marks?
A: Pan might not be hot enough. Let it preheat 3-5 minutes. Or you’re moving the chicken too early—wait the full 5-6 minutes before flipping.
Q: My chicken is dry. What happened?
A: Overcooked. Next time, remove at 160°F and let carryover cooking finish it. Meat thermometer prevents guessing.
Q: Can I use a regular skillet without ridges?
A: Yes, it will taste great but won’t have pretty grill marks. Use the exact same method.
Q: Should I cover the pan?
A: No. Covering traps steam, which defeats the purpose of grilling. Leave uncovered for crispy browning.
Q: Can I cook frozen chicken?
A: Thaw first for best results. Frozen chicken won’t brown evenly or cook consistently.
Meal Prep Ideas
Use your grilled chicken in:
- Salads: Greek salad, Caesar salad, garden salad
- Wraps: With vegetables and sauce
- Sandwiches: On bread with any toppings
- Grain bowls: Over rice or quinoa
- Tacos: Shredded or sliced
- Pasta: With any sauce
Want to try grilled chicken in other preparations? Make Easy Air Fryer Chicken Breast for a quicker 15-minute option, or Chicken Marination Basic to take your grilled chicken to the next level with deep flavors.
Final Thoughts
Grilled chicken in a pan proves you don’t need fancy equipment to cook like a restaurant. You just need a hot pan, good technique, and patience. The results speak for themselves.
Make this once. Use it all week. You’ll become the person who always has grilled chicken ready. That’s when you know a method really works.