
By Michael Hayes — RecipeTalkToday
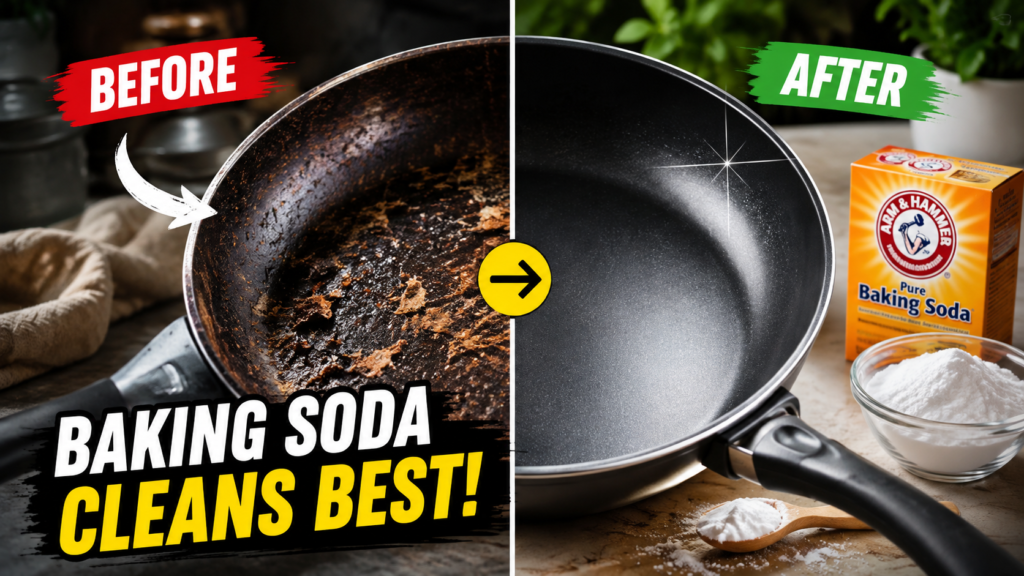
Quick Answer: To clean a frying pan with baking soda, sprinkle a thick layer over the surface, add a little warm water to form a paste, let it sit 15–20 minutes, then scrub gently with a non-abrasive sponge. This works well on burnt food, grease film, and dull stains without harsh chemicals.
If you’ve ever stared at a scorched pan wondering whether it’s ruined for good, you’re not alone. Baking soda is one of the most trusted go-to tools for home cooks who want a gentle way to lift burnt bits, grease, and stubborn residue without scratching their cookware. This guide walks through exactly how to clean a frying pan with baking soda, what materials it works best on, and what to avoid so you don’t damage your pan while cleaning it.
Kitchen Cleaning
Burnt Pan Fixes
Non-Toxic Cleaning
This article on RecipeTalkToday is for general educational and buying-guidance purposes only. It does not replace the manufacturer’s official manual, food safety guidance, or professional advice. Materials, specifications, and care instructions can vary by product and should be confirmed with the manufacturer before purchase or use. For product defects, suspected food-safety issues, or injuries such as burns or cuts, contact the manufacturer, a qualified professional, or seek medical help as needed.
Why Baking Soda Works on Frying Pans
Baking soda is a mild abrasive with an alkaline nature, which is why it can help break down grease and lift burnt-on food without being as harsh as steel wool or strong chemical cleaners. When it’s made into a paste, the fine granules gently loosen debris while the alkalinity helps cut through oily residue. That combination is exactly why so many home cooks reach for it before anything else.
It’s important to understand that baking soda is not a miracle fix. It can help with everyday grease and light-to-moderate burnt spots, but a pan with severe scorching, warping, or a damaged nonstick coating may need a different approach or a replacement altogether.
Which Pans This Method Works Best On
Knowing how to clean a frying pan with baking soda safely starts with knowing what kind of pan you have. Stainless steel, cast iron, and most enamel-coated pans generally tolerate baking soda well. Nonstick pans need a lighter touch, since aggressive scrubbing can wear down the coating over time.
Stainless Steel
Handles baking soda paste well and can usually take a bit more scrubbing pressure. Great for lifting stuck-on food after searing.
Cast Iron
Use sparingly and re-season afterward. Baking soda can help with rust spots but may strip a light seasoning layer if overused.
Nonstick
Use a soft sponge and gentle pressure only. Check the manufacturer’s care guidance, since some coatings are more delicate than others.
Enamel-Coated
Generally safe with a paste and soft sponge. Avoid metal scouring pads, which can chip the enamel surface.
Step-by-Step: How to Clean a Frying Pan With Baking Soda
Here’s the routine many home cooks rely on when a pan needs more than a quick rinse.
Let the pan cool completely, then rinse away loose crumbs and excess oil under warm water.
Sprinkle a generous, even layer of baking soda across the bottom of the pan, focusing on burnt or discolored spots.
Add just enough warm water to form a thick paste, roughly the texture of wet sand.
Let the paste sit for 15–20 minutes so it can loosen stuck-on residue. For heavier burns, an hour or an overnight soak can help.
Scrub in circular motions with a soft sponge or non-scratch pad, adding light pressure to lifted spots.
Rinse thoroughly with warm water and dry immediately to prevent water spots or, on cast iron, rust.
Cleaning Routine Flow
This routine is a practical guide, not a fixed rule — soak time can vary depending on how burnt the pan is.
Comparing Cleaning Methods
Common Problems and What’s Likely Causing Them
Not every stain or stuck-on patch has the same cause, and knowing the difference helps you choose the right fix instead of scrubbing blindly.
Problem vs. Likely Cause
Tip: In daily cooking, I usually notice that pans left to soak with warm water right after cooking need far less scrubbing later. A quick rinse habit can prevent most burnt-on buildup before it sets.
Safe Practices vs. Risky Habits
Some habits make baking soda cleaning safer and more effective, while others can damage your cookware or create unnecessary mess.
Safety Decision Path
Is the burnt spot light or moderate?
Yes → Use baking soda paste and a soft sponge
No, it’s severe or the pan is warped/cracked → Stop and check the manufacturer’s guidance, or consider replacement
This is a practical guide for everyday kitchen decisions, not a technical inspection standard.
Common Mistakes When Cleaning a Frying Pan With Baking Soda
Even a simple method has a few common missteps. Using too little water can make the paste crumbly and less effective, while using too much turns it into a runny mix that slides off the pan. Scrubbing immediately without letting the paste sit is another frequent mistake — the sitting time is what actually loosens residue, so skipping it just means more elbow grease.
Another mistake beginners make is using a hard-bristled or metal brush on nonstick surfaces. Experienced home cooks tend to check the sponge type before scrubbing and reach for soft microfiber or non-scratch pads instead.
Care & Maintenance Checklist
Choosing the Right Tools for the Job
A good sponge or brush makes a real difference in how well this method works and how safe it is for your cookware.
Tool Fit by Pan Material
This article may contain affiliate links. If you buy through these links, RecipeTalkToday may earn a small commission at no extra cost to you. We only mention products that fit the topic and recommend checking current specs and care instructions directly with the manufacturer.
Non-Scratch Scrub Sponges (Multi-Pack)
Many home cooks find a soft, non-scratch sponge convenient for applying baking soda paste without risking surface scratches on nonstick or coated pans.
Chainmail Scrubber for Cast Iron
Can support gentler daily cleaning on cast iron surfaces compared to metal scourers, which may help preserve seasoning over time.
Relative Cleaning Difficulty by Stain Type
Light grease film
Moderate burnt spots
Heavy baked-on residue
Deep scorch marks
This is a practical guide to typical routine priority, not lab-tested data.
Mistake vs. Better Choice
Warning: Avoid mixing baking soda with strong acidic cleaners or bleach-based products, as combining cleaning agents can create unwanted reactions. Stick to one method at a time and rinse thoroughly between different cleaning approaches.
When to Contact a Professional or Manufacturer
If a pan shows persistent warping, cracking, peeling nonstick coating, or repeated food sticking even after cleaning, check the manufacturer’s guidance or contact them directly, since these can be signs the pan needs replacing. If you experience a burn, cut, or suspect a food-safety issue related to cookware, seek medical help or contact a qualified professional as needed. Baking soda cleaning is a routine home method and is not a substitute for addressing product defects or injuries.
Pro Tips for Better Results
For tougher, baked-on grime, try combining the baking soda paste with a short simmer: add water and a spoonful of baking soda to the pan, bring it to a gentle simmer for a few minutes, then let it cool before scrubbing. This can loosen residue that a plain paste alone might struggle with. Many home cooks find this combination especially useful after searing meat or cooking with sugary sauces, which tend to leave stickier residue behind.
Always confirm any deep-cleaning method against the manufacturer’s care instructions, especially for coated or specialty cookware, since materials vary between brands.
For general food-contact material safety guidance, you can review resources from the FDA and food safety practices from FoodSafety.gov. If you ever suspect a cookware defect or safety hazard, the Consumer Product Safety Commission is a helpful resource for reporting and checking recalls.
Frequently Asked Questions
Is it safe to clean a frying pan with baking soda every day?
Occasional use is generally fine for most materials, but daily heavy scrubbing isn’t necessary for light everyday grease. Save the baking soda paste method for burnt spots or stubborn residue, and use mild dish soap for routine cleaning.
Can baking soda damage a nonstick pan?
Used gently with a soft sponge, baking soda is usually considered a safer option than harsh scouring pads. Aggressive scrubbing or abrasive tools are more likely to wear down a nonstick coating than the baking soda itself.
How long should baking soda paste sit on a burnt pan?
15–20 minutes works for light residue, while heavier burnt spots may benefit from an hour or an overnight soak. Check periodically and scrub gently once the paste has had time to loosen the buildup.
What ratio of baking soda to water should I use?
A common approach is roughly equal parts baking soda and water, adjusted until the mixture forms a thick, spreadable paste similar to wet sand. Add water gradually so it doesn’t become too runny.
Can I use baking soda on cast iron cookware?
Yes, but use it sparingly and re-season the pan afterward, since baking soda can strip some of the seasoning layer along with the residue. For routine cleaning, a simple hot water rinse and soft brush is often gentler.
Why isn’t baking soda removing all the burnt residue?
Very deep scorch marks may need repeated applications or a longer soak. If the residue still won’t budge after a few attempts, check the manufacturer’s care guidance, since some coatings shouldn’t be scrubbed aggressively regardless of the cleaner used.
Do I need to rinse the pan thoroughly after using baking soda?
Yes, rinse well until no gritty residue remains, then dry the pan completely. This helps prevent water spots and, on materials like cast iron, protects against rust.
Knowing how to clean a frying pan with baking soda gives you a simple, low-cost way to handle everyday grease and light burnt spots without harsh chemicals. Always match your cleaning approach to your pan’s material, test on a small area first, and confirm care instructions with the manufacturer when in doubt. For persistent damage, defects, or any injuries while cooking or cleaning, reach out to a qualified professional or seek medical help as needed. — RecipeTalkToday
