
By Michael Hayes
Quick Answer: To learn how to measure ingredients correctly, use a kitchen scale when a recipe lists grams, dry measuring cups for flour and sugar, and a clear liquid cup for liquids. Spoon dry ingredients in, level the top with a straight edge, and check liquids at eye level.
Measuring looks simple, but small slips can change how a recipe turns out. Too much flour can make a cake dry, and too little salt can leave soup flat. Knowing how to measure ingredients correctly helps you get steadier results with less waste.
In this guide, you will learn which tools to use, how to measure dry and liquid ingredients, and how to fix common problems.
This article is for general educational and buying-guidance purposes only. It does not replace the manufacturer’s official manual, food safety guidance, or professional advice. Materials, specifications, and care instructions can vary by product and should be confirmed with the manufacturer before purchase or use. For product defects, suspected food-safety issues, or injuries such as burns or cuts, contact the manufacturer, a qualified professional, or seek medical help as needed.
Why Accurate Measuring Matters
Recipes are written with certain amounts in mind. Flour, sugar, fat, and leavening work together, so changing one can change the texture. Learning how to measure ingredients correctly matters most in baking, which is less forgiving than cooking. A soup can handle an extra pinch of pepper, but a cake may not handle an extra half cup of flour.
Choose careful measuring when you bake. Choose taste-and-adjust when you simmer a sauce or stew.
Know Your Measuring Tools
Picking the right tool for each ingredient is a big reason results stay steady from batch to batch.
Measuring Tools Compared
How to Measure Dry Ingredients
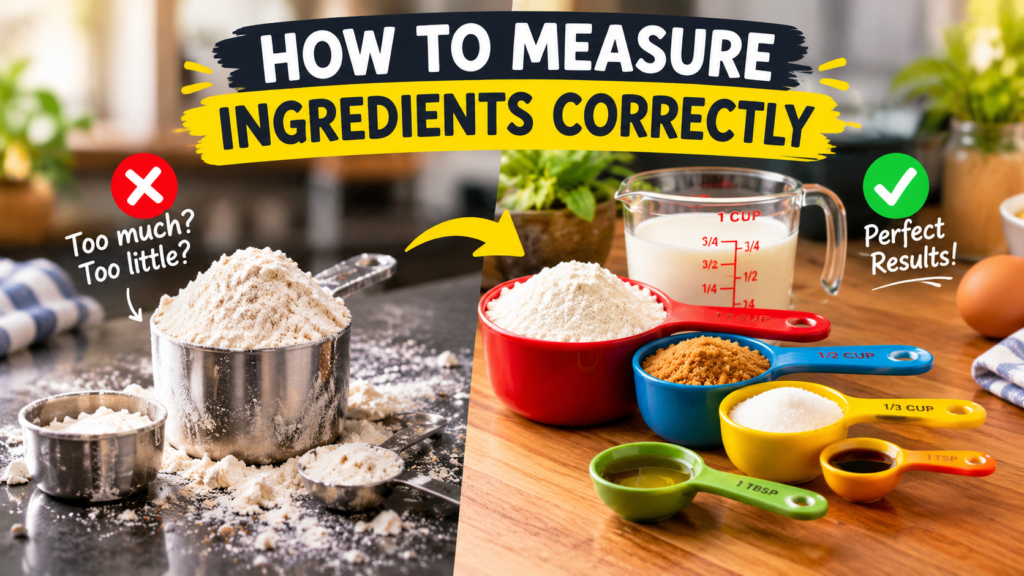
For flour, stir it first because it settles and packs down in the bag. Spoon it lightly into a dry measuring cup until it mounds over the top, then sweep a straight edge across to level it. Do the same with spoons. Granulated sugar can be scooped and leveled. Brown sugar is usually packed firmly, unless your recipe says otherwise.
Pay attention to wording. “1 cup sifted flour” means sift first, then measure. “1 cup flour, sifted” means measure first, then sift.
Tip: Check your scale with a US nickel. It weighs 5 grams, so a quick test can show whether your scale looks roughly right.
How to Measure Liquids and Sticky Ingredients
Set a clear liquid measuring cup on a flat counter. Pour in the liquid, then bend down so your eyes are level with the line. Reading from above can make you pour too little or too much. For oil, honey, or syrup, a light coat of oil or cooking spray on the cup helps the sticky food slide out.
Note: A fluid ounce measures volume, while an ounce on a scale measures weight. They are not the same, so follow the unit your recipe uses.
Not sure which method fits? The flow below gives a simple path from recipe to tool.
Practical guide: Which measuring method should you use?
Use a kitchen scale and the tare button. Add each ingredient straight into the bowl.
Use dry cups or spoons. Spoon in, then level.
Use a clear liquid cup and read it at eye level.
Lightly oil the tool first, then scrape it clean.
Start at the top and stop at the first “yes.” That is your best tool for that ingredient.
Step-by-Step: How to Measure Ingredients Correctly
- Read the recipe first. Note whether amounts are in cups, grams, or ounces, and gather matching tools.
- Wash your hands and tools. Start with clean, dry cups and spoons so ingredients do not clump or pick up stray flavors.
- Weigh when you can. Place a bowl on the scale, press tare, and add the ingredient until you reach the number.
- Spoon and level dry foods. Fill the cup or spoon, then sweep off the extra with a straight edge over the canister.
- Pour liquids at eye level. Check the line from the side, not from above.
- Add ingredients in order. Follow the recipe order and keep wet and dry mixes separate until told to combine.
Fixing Common Measuring Problems
Problem vs Likely Cause
If your results still look off, work down the path below.
Practical guide: Troubleshooting path
Next time, stir, spoon, and level it.
Switch to a scale for steadier amounts.
Use less coarse salt or follow the recipe’s named brand.
Check recipe notes, ingredient freshness, and oven accuracy.
Fix one thing at a time so you can tell which change helped.
Keep Measuring Clean and Safe
Measuring tools touch many foods, so clean habits matter. Raw eggs and raw flour can carry germs, so wash tools after contact and never taste raw batter or dough.
Safer Practice vs Risky Practice
Safety Note: Follow current guidance from FoodSafety.gov for raw flour, eggs, and cross-contamination. Keep raw ingredients separate from foods that will not be cooked.
Warning: Do not pour hot oil or syrup into thin plastic or cold glass unless the manufacturer says it is heat-safe. Heat can warp or crack some tools, and hot liquid can cause burns.
Care for Your Measuring Tools
Well-kept tools stay easy to read and easy to trust. This checklist covers the basics.
Practical guide: Care checklist
Rinse sticky or oily residue right away. Follow the maker’s guidance for the dishwasher.
Damp tools make flour clump. Dry cups and spoons before the next use.
Faded lines are hard to read. Replace tools when numbers wear off.
Keep matching sets on a ring or in one drawer. That saves time and prevents mix-ups.
Drying and storing tools together keeps your routine smooth.
Choose Tools That Fit How You Cook
Material and Tool Fit
See which of these four cooks sounds most like you.
Practical guide: Tool fit dashboard
Choose a scale plus a full set of dry cups. Weighing flour and sugar can make batches more repeatable.
Choose measuring spoons and one liquid cup. These cover most sauces, soups, and rice.
Choose a nested cup and spoon set. Clear markings help you learn the sizes.
Choose a scale with a gram setting. It avoids converting cups every time.
Start with the tools you use weekly.
Mistake vs Better Choice
Which ingredients need the most care? This simple meter ranks them for everyday cooks.
Practical guide: Typical routine priority (a rough guide, not scientific data)
Spend extra care where the bar is longest.
When to Contact the Manufacturer or a Professional: Contact the maker if your scale gives different weights for the same item, if markings fade, or if a battery compartment looks damaged. For a serious burn, seek medical help. For suspected food-safety problems, see the FDA or a healthcare provider.
Helpful Measuring Tools to Consider
This article may contain affiliate links. If you buy through these links, we may earn a small commission at no extra cost to you. We only mention products that fit the topic and recommend checking current specs and care instructions directly with the manufacturer.
Digital Kitchen Scale
Can make recipes listed in grams easier to follow and may support more consistent baking.
Measuring Cups and Spoons Set
Many home cooks find a nested set convenient for everyday dry measuring.
Frequently Asked Questions
How do I measure flour without packing it?
Stir the flour first, spoon it lightly into a dry measuring cup, and level the top with a straight edge. Avoid scooping with the cup, because that can pack in extra flour.
Is it better to weigh ingredients or use cups?
A kitchen scale is usually more consistent, especially for baking. Cups and spoons work well for many everyday recipes, as long as you spoon and level dry ingredients.
What is the difference between ounces and fluid ounces?
Ounces measure weight, while fluid ounces measure volume. A cup of flour and a cup of water both fill the same space, but they do not weigh the same.
How many tablespoons are in a cup?
There are 16 tablespoons in 1 cup. A quarter cup equals 4 tablespoons, and 1 tablespoon equals 3 teaspoons.
Can I use a liquid measuring cup for dry ingredients?
It is not ideal. Liquid cups have extra space above the top line, so leveling dry ingredients is hard. Use dry measuring cups for flour, sugar, and similar foods.
What is the best way to learn how to measure ingredients correctly?
Start with the spoon-and-level method, use the right cup for each ingredient, and add a kitchen scale when you want steadier baking results. Follow the units your recipe lists.
How do I measure sticky ingredients like honey?
Lightly coat the measuring cup or spoon with a little oil or cooking spray first. The honey or syrup should slide out more easily, so more of it ends up in your recipe.
Final Thoughts
Once you know how to measure ingredients correctly, the habits feel automatic: pick the right tool, spoon and level dry foods, and read liquids at eye level.
Check the manufacturer’s instructions for your tools, keep raw ingredients clean and separate, and seek professional or medical help for serious burns or food-safety concerns.
