By Emma Hayes — RecipeTalkToday
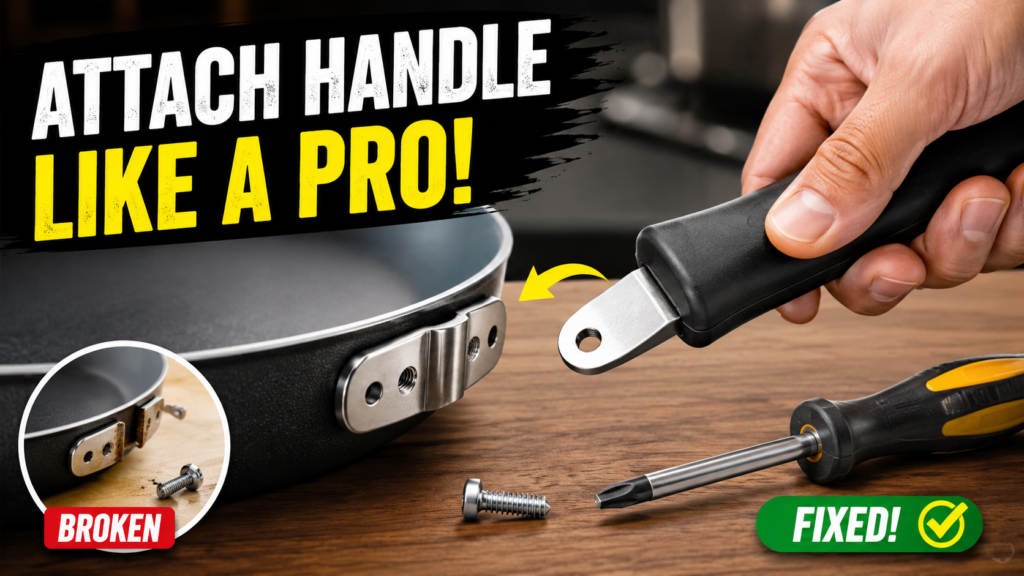
Quick Answer: To attach a handle to a frying pan, match the screw or rivet holes to the pan’s existing holes, use heat-resistant, food-safe hardware, tighten evenly in a crisscross pattern, and check for wobble before cooking. Always confirm screw size and material with the manufacturer when possible.
A loose or broken handle can turn a favorite frying pan into a safety hazard fast. Whether you’re fixing a wobbly grip or replacing a cracked handle entirely, knowing how to attach a handle to a frying pan the right way keeps your cookware stable and your kitchen safer.
cookware repair
frying pan handle
kitchen tool safety
cookware maintenance
This article on RecipeTalkToday is for general educational and buying-guidance purposes only. It does not replace the manufacturer’s official manual, food safety guidance, or professional advice. Materials, specifications, and care instructions can vary by product and should be confirmed with the manufacturer before purchase or use. For product defects, suspected food-safety issues, or injuries such as burns or cuts, contact the manufacturer, a qualified professional, or seek medical help as needed.
Why Frying Pan Handles Come Loose or Break
Most home cooks only think about how to attach a handle to a frying pan after something goes wrong. Handles loosen from repeated heat cycles, vibration during cooking, or hardware that slowly works itself free over months of use. In daily cooking, I usually notice the wobble starts small — a slight give when you lift the pan — long before it becomes a real problem.
Ignoring a loose handle isn’t just inconvenient. A pan that tips unexpectedly while it’s full of hot oil or sauce can cause burns, spills, or a dropped pan altogether. Understanding the likely cause helps you pick the right fix instead of guessing.
What You Need Before You Attach a Handle to a Frying Pan
Before you attach a handle to a frying pan, take a few minutes to check what you’re working with. A rushed fix often leads to a wobbly repeat repair a few weeks later.
Handle Material
Wood, phenolic (heat-resistant plastic), and stainless steel are common replacement handle materials. Each has different heat tolerance, so check the manufacturer’s guidance if you’re unsure what your pan originally used.
Screw or Rivet Type
Most pans use either machine screws with nuts or solid rivets. Rivets are more permanent, while screws allow future adjustment — many home cooks find screws more convenient for repairs.
Pan Material
Stainless steel, cast iron, and nonstick aluminum pans all mount handles slightly differently. Confirm hole spacing matches before ordering hardware or a replacement handle.
Heat Exposure Zone
Check how close the handle mounting point sits to direct heat. This can help you decide whether heat-resistant hardware is necessary for a safe, lasting attachment.
Step-by-Step: How to Attach a Handle to a Frying Pan
Here is a practical, beginner-friendly routine for how to attach a handle to a frying pan at home. Always check your specific pan’s manual first, since mounting styles vary.
Let the pan cool completely and remove any remaining screws, nuts, or rivet fragments from the old handle.
Line up the new or replacement handle so its mounting holes match the pan’s existing holes exactly.
Insert food-safe, heat-rated screws through the holes from the pan side, with washers if the original design used them.
Hand-tighten nuts or screws in a crisscross pattern rather than fully tightening one at a time.
Use a screwdriver or wrench to snug everything firmly, checking that the handle sits flush against the pan.
Test the handle by gently lifting an empty pan before returning it to regular cooking use.
Practical guide: handle attachment routine
This flow keeps pressure even across the mounting points, which helps prevent the handle from tightening crooked.
Choosing the Right Replacement Handle
Picking the right replacement matters as much as the attachment itself. A mismatched handle can make it harder to attach a handle to a frying pan securely, even with new hardware.
This article may contain affiliate links. If you buy through these links, RecipeTalkToday may earn a small commission at no extra cost to you. We only mention products that fit the topic and recommend checking current specs and care instructions directly with the manufacturer.
Universal Replacement Frying Pan Handle
A universal handle can make it easier for many home cooks to attach a handle to a frying pan without hunting for a brand-specific part, since it’s designed to fit common hole spacing patterns.
Safe vs Risky Practices When Reattaching a Handle
Safety note: A pan handle that feels loose again shortly after a repair may indicate worn mounting holes. Continuing to use a wobbly pan over heat increases the risk of spills, burns, or dropped cookware.
Tools and Hardware That Make the Job Easier
Having the right small parts on hand makes it much simpler to attach a handle to a frying pan without a return trip to the store.
Heat-Resistant Cookware Handle Screw Kit
A dedicated screw kit can make daily cooking easier by giving you correctly sized, heat-rated hardware instead of guessing with general-purpose screws.
Common Mistakes vs Better Choices
Troubleshooting: Handle Still Wobbly or Won’t Tighten
Safety and troubleshooting decision path
Handle still loose after tightening? → Check if screw threads are stripped.
Threads stripped? → Replace with a slightly larger, correctly rated screw.
Holes in the pan itself look worn or enlarged? → This may need a manufacturer replacement part rather than a DIY fix.
Handle cracked near the base? → Replace the handle entirely instead of reattaching a damaged one.
This path helps you decide whether a simple hardware swap is enough, or whether the issue needs manufacturer support.
Care and Maintenance After Reattaching the Handle
Care and maintenance checklist
✔ Check handle tightness monthly, especially with frequent stovetop use
✔ Avoid submerging wood or phenolic handles in water for long periods
✔ Dry hardware fully after washing to help prevent rust
✔ Retighten promptly at the first sign of wobble
What Experienced Home Cooks Check That Beginners Miss
Hole Wear, Not Just Screw Wear
Experienced cooks check whether the mounting holes themselves have widened, since new hardware alone won’t fix worn-out holes.
Balance Under Load
They test the pan with its usual contents, not just empty, since weight changes how a slightly loose handle behaves.
How Long a Reattached Handle Should Hold Up
Typical routine priority: what affects handle longevity
Hardware quality
Correct hole alignment
Regular tightness checks
Handle material choice
This is a practical guide to relative priority, not lab-tested data — hardware quality and alignment tend to matter most for a lasting repair.
Product and Tool Fit at a Glance
Product and tool fit dashboard
Nonstick pan, everyday use → Phenolic replacement handle + standard screws
Cast iron skillet → Matching cast metal handle or manufacturer part
Oven-to-stove stainless pan → Stainless steel handle rated for oven use
Use this as a starting point, then confirm exact specs with your pan’s manufacturer.
When to Contact a Professional or the Manufacturer
If the pan’s mounting holes are stripped, cracked, or enlarged beyond repair, if you suspect the pan’s coating or base is damaged, or if you experience a burn or cut while attempting a repair, stop and contact the manufacturer or seek professional or medical help as appropriate. Do not continue using cookware that feels structurally unstable.
For general product safety guidance, the U.S. Consumer Product Safety Commission offers information on cookware and household product recalls.
Frequently Asked Questions
Can I attach a handle to a frying pan without matching the original hole pattern?
It’s difficult and generally not recommended, since drilling new holes can weaken the pan or affect its structure. Check with the manufacturer before modifying the pan.
What screws should I use to attach a handle to a frying pan?
Use food-safe, heat-rated screws sized to match your pan’s original hardware. Avoid general hardware-store screws that aren’t rated for cooking heat.
Is it safe to use glue instead of screws?
Glue is generally not a safe long-term option near heat sources. Mechanical hardware rated for kitchen use is a more secure and durable choice.
How often should I check a repaired handle?
Many home cooks find it helpful to check handle tightness monthly, or any time the pan feels different when lifted.
Can I put the pan in the dishwasher after reattaching the handle?
This depends on the handle material and the manufacturer’s care instructions. Wood and some phenolic handles are often not dishwasher-safe.
When should I replace the whole pan instead of the handle?
If the cooking surface is damaged, warped, or the coating is failing, replacing the pan may make more sense than repairing just the handle.
Do all frying pans use the same handle attachment method?
No. Screw-and-nut, rivet, and welded attachments all exist. Check your pan’s manual to confirm which method applies before starting a repair.
Learning how to attach a handle to a frying pan safely comes down to matching the right hardware, tightening evenly, and testing before you cook. Always confirm materials and care instructions with the manufacturer, and seek professional or medical help for injuries, product defects, or persistent food-safety concerns.
— RecipeTalkToday