
By Michael Hayes
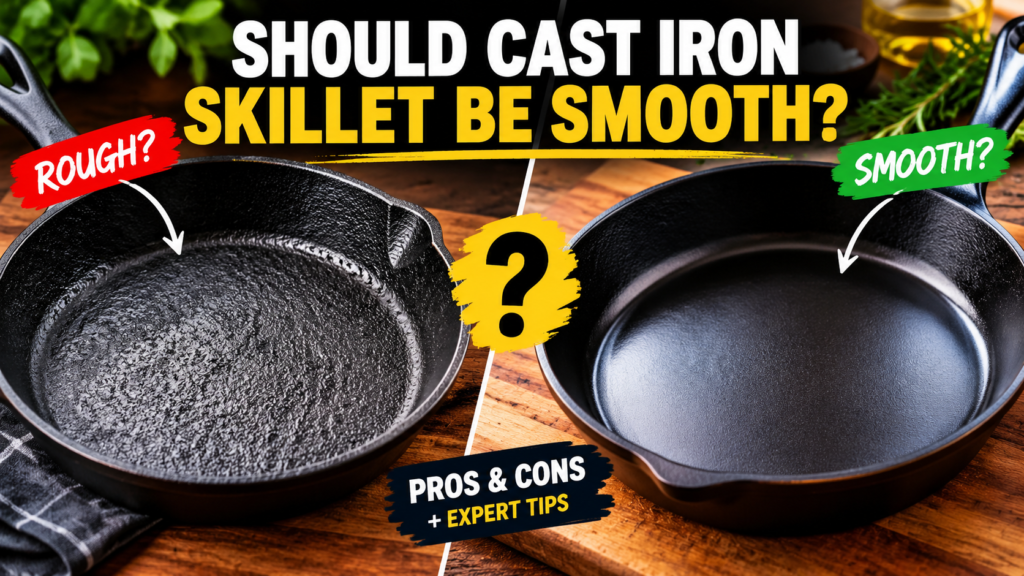
Quick Answer: Not necessarily. Vintage cast iron skillets were often polished smooth, while most modern skillets have a slightly pebbly surface. Should cast iron skillet be smooth? It is nice to have, but good seasoning, dry storage, and proper heat control matter more for nonstick performance.
Pick up a vintage skillet and a new one, and the difference is easy to feel. One seems like polished stone; the other feels slightly bumpy. This guide answers a common question: should cast iron skillet be smooth, or is texture normal? You will learn why the surfaces differ, what really affects sticking, and how to choose and care for your pan.
This article is for general educational and buying-guidance purposes only. It does not replace the manufacturer’s official manual, food safety guidance, or professional advice. Materials, specifications, and care instructions can vary by product and should be confirmed with the manufacturer before purchase or use. For product defects, suspected food-safety issues, or injuries such as burns or cuts, contact the manufacturer, a qualified professional, or seek medical help as needed.
Why Vintage and Modern Skillets Feel Different
Cast iron is poured into sand molds, which leaves a slightly rough, pebbly texture. Many older skillets were tumbled or ground and polished afterward, so they often feel glassy. Many modern makers skip that step to keep prices down, so most skillets sold today feel bumpy from the box. A few smaller makers still sell polished pans, usually at a higher price.
Weight differs too. Vintage pans are often thinner and lighter, while many modern skillets are thicker. Thick walls can hold heat well for searing but feel heavier to lift.
Beginners can check a pan by sliding a clean fingertip across the cooking surface. Tiny bumps suggest a standard casting. A glassy feel suggests polishing or years of use. Experienced cooks often notice that a well-used modern pan can feel smoother in the center while staying rougher near the walls.
Vintage vs Modern Skillet Comparison
Should Cast Iron Skillet Be Smooth for Everyday Cooking?
For most home cooks, no. A smooth surface gives food less to grip, so eggs and fish may release more easily at first. Still, a pebbly pan can perform very well once seasoning fills in the texture, and many pans smooth out gradually with regular use. Smooth helps, but it is not required. Experienced cooks often say the difference is most noticeable with delicate foods like eggs and fish, and less noticeable when searing meat or baking cornbread.
Choose a pebbly pan if you cook a variety of meals and want a lower price. Avoid assuming a polished pan fixes poor technique. Check the manufacturer’s guidance if your pan has a special finish.
Tip: If an egg sticks in a new pebbly pan, check preheating, fat, and seasoning thickness first. These usually matter more than texture.
This quick flow shows a simple seasoning routine.
Most of the work happens in steps two and three. Dry metal and a very thin oil layer help seasoning bond evenly.
Common Sticking Problems and Causes
Smooth Does Not Always Mean Nonstick
A polished surface can look slick, yet still stick if seasoning is thin or heat is wrong. A pebbly skillet with well-built seasoning can release food nicely. Texture gives you a head start; technique finishes the job.
What can go wrong? Cooks sometimes chase smoothness with aggressive tools and strip seasoning or thin the metal unevenly. Others add thick oil layers hoping to fill the bumps, which usually produces a tacky finish. Gentle, repeated thin layers work better than shortcuts.
Note: Should cast iron skillet be smooth to release food? Not by itself. Seasoning, preheating, and enough fat work together.
Use this decision path when food sticks or the surface feels off.
Start with the surface feel, then adjust heat and fat. Most sticking problems have simple fixes.
How to Build a Smoother Surface Over Time
Seasoning is a thin, baked-on layer of oil that fills small gaps and helps food release. These five steps suit most skillets, but always confirm them against your maker’s instructions.
- Wash and dry. Use warm water and a soft brush, then dry right away, ideally on a warm burner.
- Inspect. Look for rust, flaking, or sticky patches and scrub them off first.
- Oil thinly. Rub on a very thin layer of cooking oil, then wipe it off until the surface looks nearly dry.
- Heat as directed. Follow your manufacturer’s oven temperature and time, with the kitchen ventilated.
- Cool and repeat. Let the pan cool safely, then repeat a few times and cook with it often.
Expect the surface to improve slowly. After several weeks of regular cooking, many home cooks notice it looks darker and feels slicker.
Warning: Hot pans and oven racks cause serious burns. Use dry oven mitts, keep children away, and never leave smoking oil unattended. Seek medical help for serious burns.
Safety note: Some owners sand or grind modern pans smooth. This can create fine dust and may affect warranty, so ask the manufacturer first. Choose this only if you are comfortable with the work.
Recommended vs Risky Practices
Daily Care Habits That Improve the Surface
A realistic example: after searing chicken, wipe the warm pan, dry it, and add a few drops of oil. That two-minute habit does more for smoothness than an occasional deep restoration. This dashboard turns the routine into four habits.
These habits are simple, but together they build a smoother, more reliable surface.
Common Mistakes and Better Choices
Choosing Between Pebbly and Polished Skillets
So should cast iron skillet be smooth when you shop? If you want a slick finish and lighter handling, a vintage or polished pan may be worth the cost. If you want durability on a budget, a standard modern skillet is a sensible start.
Check listings for words like polished, machined, or pre-seasoned, and confirm details with the manufacturer, since finishes vary. Buying used? Inspect for cracks, deep pits, and wobble before paying.
Skillet Type and Cook Fit
This fit dashboard compares two paths.
Neither path is wrong. Match the pan to your budget, strength, and cooking habits.
Here is a relative priority meter for everyday care. It is a practical guide, not lab data.
Texture matters, but drying and thin oil usually deserve more attention.
Accuracy note: For general food safety, see FoodSafety.gov. To report a dangerous product defect, visit the Consumer Product Safety Commission.
When to contact the manufacturer or a professional: Contact the maker for cracks, warping, defects, or warranty questions, and before sanding or grinding. Contact a qualified professional about a suspected food-safety issue. Seek medical help for deep cuts or serious burns.
Frequently Asked Questions
Should cast iron skillet be smooth or pebbly?
Either can work well. A smooth surface may release food more easily at first, but a pebbly skillet can perform well once seasoning builds up.
Why is my new cast iron skillet rough?
Most modern skillets are cast in sand molds and are not polished afterward, so a pebbly texture is common.
Why are vintage cast iron skillets smoother?
Many older pans were tumbled or ground and polished after casting, which removed much of the sand texture.
Can I make a modern skillet smoother?
Regular cooking and thin seasoning layers can smooth the surface gradually. Sanding is possible but is a bigger project, so ask the manufacturer first.
Is a smooth skillet automatically nonstick?
No. Nonstick performance depends on seasoning, preheating, and technique more than texture alone.
Why does my seasoned skillet feel sticky?
Too much oil was usually left on during seasoning. Wipe oil off until the surface looks nearly dry, then re-season with a thinner layer.
When should I contact the manufacturer?
Contact them about cracks, warping, defects, warranty questions, or before sanding. Seek medical help for serious burns or deep cuts.
Final Thoughts
So, should cast iron skillet be smooth? It can be a pleasant bonus, but it is not the main factor. Thin seasoning layers, thorough drying, steady heat, and regular use do most of the work. Check your manufacturer’s instructions, confirm material and care needs, follow food-safety guidance, and seek help for serious burns, cuts, or product defects.
