
By Emma Hayes — RecipeTalkToday
Quick Answer: To bake biscuits in an electric frying pan, preheat it to about 300–325°F, add a light layer of oil or a rack, place biscuits with space between them, cover with a lid, and cook 15–20 minutes, checking and rotating halfway for even browning.
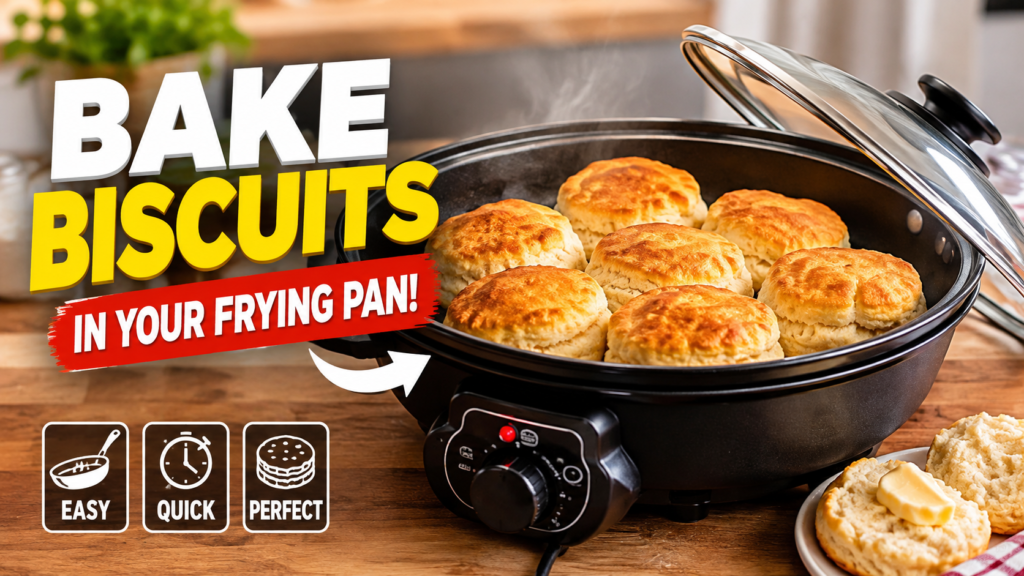
No oven? No problem. Many home cooks discover that an electric frying pan can double as a small countertop oven in a pinch, and learning how to bake biscuits in an electric frying pan opens up a simple, practical option for apartments, dorms, RVs, or a broken-oven emergency. This guide walks through the setup, the technique, and the common mistakes to avoid so your biscuits come out golden instead of burnt or doughy.
Electric Frying Pan
Countertop Baking
Kitchen Technique
No-Oven Cooking
Home Cooking Tips
This article on RecipeTalkToday is for general educational and buying-guidance purposes only. It does not replace the manufacturer’s official manual, food safety guidance, or professional advice. Materials, specifications, and care instructions can vary by product and should be confirmed with the manufacturer before purchase or use. For product defects, suspected food-safety issues, or injuries such as burns or cuts, contact the manufacturer, a qualified professional, or seek medical help as needed.
Why Bake Biscuits in an Electric Frying Pan?
An electric frying pan has its own heating element and a lid, which means it can hold a steady temperature much like a small oven. This makes it a genuinely useful stand-in when a full-size oven isn’t available. In daily cooking, I usually notice that the biggest difference from oven baking is that heat comes mostly from below, so airflow and pan placement matter more than they would in a conventional oven.
This method works well for refrigerated biscuit dough, drop biscuits, or a simple homemade dough, and it’s a practical option for small households, shared kitchens, or situations where oven access is limited.
What You Need Before You Start
Before you bake biscuits in an electric frying pan, gather a few basics: the electric frying pan with its lid, a light coating of oil or non-stick spray (or a small oven-safe rack if you have one), biscuit dough, and an oven mitt for handling the hot lid.
Note: Not every electric frying pan model behaves the same way. Some run hotter near the center, and thermostat accuracy can vary. Check the manufacturer’s guidance if your model includes a maximum recommended temperature or specific baking notes.
Electric Frying Pan vs. Conventional Oven for Biscuits
Step-by-Step: How to Bake Biscuits in an Electric Frying Pan
Preheat the electric frying pan to around 300–325°F with the lid on for a few minutes so the surface heats evenly.
Lightly grease the surface or set a small oven-safe rack inside to reduce direct bottom contact.
Place biscuits with space between them so heat and any steam can circulate.
Cover with the lid and cook for about 8–10 minutes before checking.
Rotate the biscuits for more even browning, since some models run hotter in certain spots.
Continue cooking another 7–10 minutes, checking that the tops are golden and the centers are no longer doughy.
Remove carefully with the oven mitt, since the lid and pan body will be hot, and let biscuits rest briefly before serving.
Routine flow at a glance:
This is a practical guide to the general order of steps, not a fixed timing chart — actual times vary by model and dough type.
Safety and Hygiene Checks
Safety note: Electric frying pans get hot on the sides and lid during use. Always use an oven mitt when lifting the lid or handling the pan, keep the cord away from water, and never submerge the heating base. If you notice scorched wiring, a cracked base, or a persistent burning smell unrelated to food, stop use and contact the manufacturer.
Wash your hands before handling dough, keep raw dough away from surfaces used for raw meat, and confirm biscuits reach a fully cooked, non-doughy center before eating. If you ever suspect undercooked centers repeatedly across attempts, check the manufacturer’s guidance on your pan’s actual temperature accuracy.
Safe vs. Risky Practices
Common Problems and Fixes
Problem vs. Likely Cause
Troubleshooting decision path:
Bottom too dark? → Lower heat or add a rack.
Center still doughy? → Add more covered time in short increments.
Uneven browning? → Rotate biscuits and check for hot spots.
Still inconsistent after adjustments? → Check the manufacturer’s guidance on your model’s thermostat accuracy.
Common Mistakes vs. Better Choices
Mistake vs. Better Choice
Pro Tips Experienced Home Cooks Check
Preheat fully first. Skipping preheat is one of the most common reasons biscuits cook unevenly. Give the pan a few minutes with the lid on before adding dough.
Use a rack if you have one. Elevating biscuits off the direct surface can help reduce bottom burning and mimic oven-style heat distribution.
Vent partway through. Cracking the lid briefly near the end can help tops firm up instead of staying soft from trapped steam.
Know your pan’s hot spots. Many home cooks find that running a quick test batch helps them learn where their specific model browns fastest.
Care and maintenance checklist:
☐ Let the pan cool before cleaning
☐ Detach the heating base per the manual before washing
☐ Wipe the lid and check the vent hole for buildup
☐ Inspect the cord for wear before each use
☐ Store with the lid slightly ajar to prevent trapped moisture
Relative difficulty guide (practical estimate, not lab-tested):
Refrigerated biscuit dough:
Drop biscuits:
From-scratch cut biscuits:
This reflects typical routine priority for beginners, not a scientific measurement.
Helpful Tools for This Method
This article may contain affiliate links. If you buy through these links, RecipeTalkToday may earn a small commission at no extra cost to you. We only mention products that fit the topic and recommend checking current specs and care instructions directly with the manufacturer.
Non-Stick Electric Frying Pan with Lid
A model with an adjustable thermostat and a well-fitted lid can make daily cooking easier when an oven isn’t available, and many home cooks find one convenient for this exact biscuit method.
Small Round Cooling/Baking Rack
A compact oven-safe rack that fits inside the pan may support more consistent bottom browning by lifting biscuits off direct heat.
Product/Tool Fit Guide
Which Setup Fits Your Kitchen
When to Contact a Professional or Manufacturer
Contact the manufacturer if your electric frying pan won’t hold a steady temperature, the thermostat seems broken, or you notice damage to the cord or base. Seek medical attention for burns that blister, won’t stop hurting, or cover a large area. If you suspect food-safety issues, such as biscuits that seem consistently undercooked despite following instructions, check the manufacturer’s guidance and consider food safety resources like FoodSafety.gov or the FDA.
Frequently Asked Questions
Can you really bake biscuits in an electric frying pan?
Yes, many home cooks use this method successfully when an oven isn’t available, though results can vary by model and dough type.
What temperature should I use?
A moderate setting around 300–325°F is a common starting point, though you should check your manufacturer’s guidance for exact settings.
Do I need a rack inside the pan?
A rack isn’t required, but it can help reduce bottom burning by lifting biscuits off the direct heat source.
Why are my biscuits burnt on the bottom?
This usually means the pan is running too hot at the bottom. Try lowering the temperature or adding a rack.
How do I know when the biscuits are fully cooked?
Cut one open to check the center isn’t doughy, and confirm the top has an even golden color.
Is it safe to use canned or refrigerated dough this way?
Yes, canned refrigerated biscuit dough is a common choice for this method since it’s already portioned and easy to space out in the pan.
How do I clean the pan after baking biscuits?
Let it cool, then follow the manufacturer’s manual for detaching the heating base before washing the pan body.
Learning how to bake biscuits in an electric frying pan is a handy skill for anyone without regular oven access. Keep the temperature moderate, leave room between biscuits, check doneness by cutting one open, and always confirm your specific model’s care instructions with the manufacturer. For burns, product defects, or persistent food-safety concerns, contact a qualified professional or seek medical help as needed.
— RecipeTalkToday
