
By Emma Hayes — RecipeTalkToday
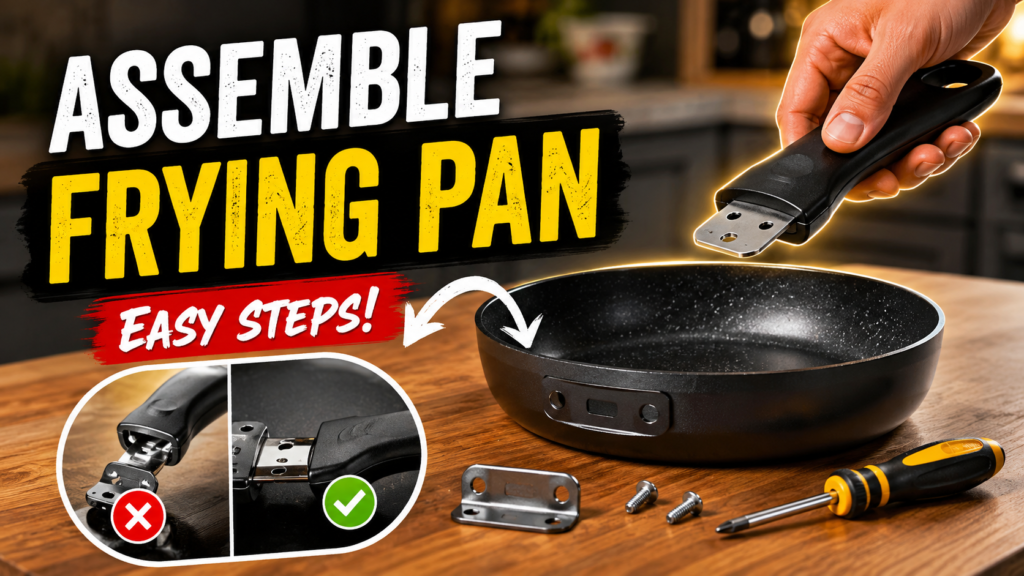
Quick Answer: To assemble a frying pan, match the handle to its mounting slot or screw holes, tighten hardware evenly with the included tool, attach any detachable lid or lock clip, and check the fit is snug before first use. Always confirm steps in the manufacturer’s manual first.
Many frying pans, especially detachable-handle sets and budget cookware, arrive partly unassembled. Knowing how to assemble a frying pan correctly protects the handle attachment, keeps the pan balanced on the stove, and helps avoid a loose grip while cooking. This guide walks through the process for the most common pan types.
Detachable handles
Screw-on handles
Kitchen setup
Cookware safety
Home cooking
This article on RecipeTalkToday is for general educational and buying-guidance purposes only. It does not replace the manufacturer’s official manual, food safety guidance, or professional advice. Materials, specifications, and care instructions can vary by product and should be confirmed with the manufacturer before purchase or use. For product defects, suspected food-safety issues, or injuries such as burns or cuts, contact the manufacturer, a qualified professional, or seek medical help as needed.
Why Assembling a Frying Pan Correctly Matters
A frying pan is only as stable as its weakest connection point. If a handle or lock clip isn’t seated properly, the pan can tip when you lift it, especially when it’s full of hot food. In daily cooking, I usually notice that a wobbly handle is one of the first signs an assembly step was skipped or rushed.
Beyond stability, a poorly assembled pan can wear out faster. Loose screws rattle against the pan body, gaskets can shift out of place, and repeated stress on a misaligned joint may loosen it further over time. Taking a few extra minutes when you assemble a frying pan for the first time can help it perform more consistently for longer.
Common Frying Pan Assembly Types
Not every pan goes together the same way. Before you assemble a frying pan, it helps to know which category it falls into, since the parts and tools involved are different.
Comparison of Frying Pan Assembly Types
Note: Riveted pans rarely need assembly, but it’s still worth checking the rivets are tight before first use, since shipping and handling can occasionally loosen fittings.
Step-by-Step: How to Assemble a Frying Pan
These steps cover the most common way people assemble a frying pan with a detachable or screw-on handle. Always check your specific manual, since hardware placement can vary between brands.
Unpack all parts and lay them out, including small screws, washers, or lock clips, so nothing gets lost in the box or packaging.
Line up the handle base with the mounting point on the pan. For detachable systems, this usually means aligning a notch or groove on the pan rim.
For clip-on handles, press until the lock lever clicks into place. For screw-on handles, insert the screw and turn gently by hand first to avoid cross-threading.
Tighten the screw or hardware evenly using the tool provided. Avoid overtightening, which can strip threads on lightweight cookware.
Attach any lid, steam vent, or lock clip that came with the set, checking that it seats flush against the rim.
Do a wobble test: lift the empty pan by the handle and gently shake it side to side. It should feel solid with no play or looseness.
Assembly routine at a glance:
Practical guide: following this order helps you catch a loose fit before the pan ever touches the stove.
Safety Checks Before First Use
Once you assemble a frying pan, a quick safety pass is worth the extra minute, especially for pans that will handle hot oil or go straight to a hot burner.
Safety check: Never use a frying pan with a loose or wobbling handle. A shifting handle under the weight of hot food or oil is a leading cause of kitchen burns. If tightening doesn’t fix it, contact the manufacturer before using the pan again.
Safe vs Risky Assembly Practices
Common Problems When Assembling a Frying Pan
Problem vs Likely Cause
Troubleshooting decision path:
Handle feels loose after assembly →
Retighten by hand → still loose? →
Check washer/gasket → still loose? →
Contact the manufacturer for a replacement part
Practical guide: stop using the pan for cooking until the handle is fully secure.
Common Mistakes to Avoid
Mistake vs Better Choice
What beginners often miss
New cooks sometimes assume all pans are ready to use out of the box. Checking the handle attachment is a habit worth building early.
What experienced cooks check
Seasoned home cooks often re-check handle tightness every few months, since normal heat cycles can gradually loosen hardware.
Maintenance checklist dashboard:
Typical routine priority: a quick check before a big cooking session helps catch issues early.
Choosing a Pan That’s Easy to Assemble
If you’re shopping for a new set, how easy a pan is to assemble is worth factoring in, especially if you’ll be swapping handles between multiple pan sizes.
Product/Tool Fit by Kitchen Need
Relative assembly difficulty:
Relative difficulty: a practical guide only, not a lab-tested measurement.
This article may contain affiliate links. If you buy through these links, RecipeTalkToday may earn a small commission at no extra cost to you. We only mention products that fit the topic and recommend checking current specs and care instructions directly with the manufacturer.
Detachable-Handle Frying Pan Set
Many home cooks find this convenient for small kitchens, since the handle clips on and off for compact storage without extra tools.
When to Contact a Professional or Manufacturer
Contact the manufacturer if hardware is missing, a handle won’t lock in after cleaning and retrying, or the pan feels unstable even after tightening. Seek medical attention for burns or cuts from a handle failure, and stop using the pan until it’s repaired or replaced. Never attempt to modify electrical parts on an electric frying pan yourself.
Frequently Asked Questions
Do all frying pans need to be assembled?
No. Many riveted pans come fully assembled. Detachable-handle sets, some screw-on handle pans, and electric frying pans are the types most likely to need assembly.
What tools do I need to assemble a frying pan?
Most detachable systems need no tools. Screw-on handles usually include a small screwdriver or hex key in the box.
Why is my frying pan handle still loose after tightening?
A worn washer, stripped screw threads, or debris in the mounting slot can prevent a tight fit. If retightening doesn’t help, contact the manufacturer for a replacement part.
Is it safe to use a frying pan before checking the assembly?
It’s best to do a quick wobble test on a cool, empty pan first. Cooking with an unchecked handle raises the risk of spills or burns if the handle isn’t fully secure.
Can I use a screw from another pan to fix a missing part?
This isn’t recommended, since screws vary in thread size and length between brands. Contact the manufacturer for the correct replacement hardware.
How often should I recheck a frying pan’s assembly?
Checking every few months is a reasonable routine for handles used often, since regular heat exposure can gradually loosen hardware.
What should I do if the pan feels unsafe even after assembly?
Stop using it right away and contact the manufacturer. Don’t attempt further repairs on your own if the instability continues after following the manual.
Taking a few extra minutes to assemble a frying pan properly can make everyday cooking safer and more comfortable. Always confirm assembly steps and care instructions with your pan’s manufacturer, and seek professional or medical help for any injury, persistent defect, or food-safety concern. — RecipeTalkToday
