
By Michael Hayes
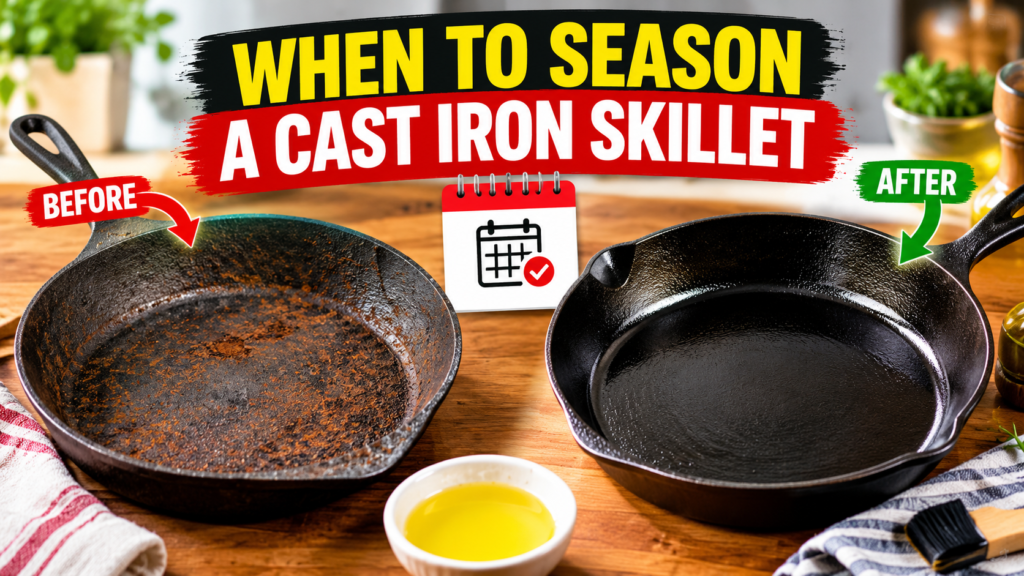
Quick Answer: Season your pan when it is new, dull, rusty, or sticky. Here is when to season a cast iron skillet: after rust removal, harsh scrubbing, or long acidic cooking, and as a thin oil wipe after routine cleaning.
Why Seasoning Timing Matters
Seasoning is the thin, baked-on oil layer that helps cast iron resist rust and release food more easily. Many home cooks season too often or not often enough, which leads to sticky or patchy surfaces. This guide explains when to season a cast iron skillet and how to spot the signs.
You will learn the warning signs, a simple oven method, and common mistakes to avoid.
This article is for general educational and buying-guidance purposes only. It does not replace the manufacturer’s official manual, food safety guidance, or professional advice. Materials, specifications, and care instructions can vary by product and should be confirmed with the manufacturer before purchase or use. For product defects, suspected food-safety issues, or injuries such as burns or cuts, contact the manufacturer, a qualified professional, or seek medical help as needed.
What Seasoning Really Does
Seasoning is not a coating you apply once and forget. When a thin layer of oil is heated past its smoke point, it bonds to the metal and forms a hard, slick finish. Each time you cook with fat, the layer can build a little more. Acidic foods, harsh scrubbing, and long soaking can wear it down.
Note: A dark, uneven surface is normal. Seasoning does not need to look like a perfect black mirror to work well.
Signs It Is Time: When to Season a Cast Iron Skillet
Your skillet usually tells you what it needs. Look and feel first. Dull gray patches, rising stickiness, orange rust, or a bare spot after scrubbing all point toward a fresh coat. Experienced cooks also notice eggs starting to grab the pan.
Comparison: When to Season a Cast Iron Skillet by Situation
Basic Seasoning Flow
This flow shows the usual order of one seasoning session.
Practical guide
Most mistakes happen at step three. Too much oil leads to a sticky finish, so wipe until the pan looks almost dry.
New, Pre-Seasoned, and Older Skillets
Knowing when to season a cast iron skillet that is brand new is easy: do it before the first meal. A pre-seasoned pan can cook right away, but many home cooks add a few thin coats for a smoother finish. Older pans with a rough or flaky surface may need a reset. Choose extra seasoning if the surface feels rough. Skip it if eggs already slide easily.
Tip: Several thin coats beat one thick coat. Thin layers cure harder and are less likely to turn sticky.
Fixing Common Seasoning Problems
Most problems trace back to oil amount, heat, or moisture.
Problem vs Likely Cause
How to Season Your Skillet Step by Step
Once you know when to season a cast iron skillet, the process is mostly waiting. Follow your manufacturer’s instructions first, since oils and temperatures vary.
- Wash and scrub. Use warm water and a brush to remove loose residue, then dry well.
- Dry with heat. Warm the pan briefly on a burner to drive off hidden moisture, then let it cool until safe to touch.
- Apply thin oil. Rub a very thin layer of high smoke-point oil over every surface, including the handle and bottom.
- Wipe it off. Buff with a clean cloth until the pan looks almost dry.
- Bake upside down. Place foil or a tray on a lower rack for drips. Many guides suggest roughly 450 to 500°F for about an hour; confirm with your manufacturer and oil label.
- Cool in the oven. Turn the oven off and let the pan cool inside. Repeat for extra coats if you like.
Warning: Hot iron and hot oil can cause serious burns. Use dry oven mitts, ventilate the kitchen, and expect some smoke, so keep an eye on smoke detectors.
Quick Decision Path
Use this path to decide your next move.
Practical guide
Is there rust? Yes: scrub it off, dry, then season.
No rust, but dull or sticking? Yes: season with thin coats.
Looks and cooks fine? Just wipe on a thin oil film after cleaning.
Start with rust because it spreads when ignored. If the surface is healthy, simple upkeep beats a full reseason.
Safe Habits vs Risky Habits
For general kitchen guidance, see FoodSafety.gov.
Recommended Practice vs Risky Practice
Accuracy/Safety Note: Never leave a hot oven session unattended for long, and keep children and pets away from hot cookware. Oil temperatures and times vary, so confirm details with the pan maker.
Weekly Care Checklist
These four habits cover most routine care.
Practical guide
Wash with warm water and a brush. Skip long soaks.
Towel dry, then warm briefly on the stove. Moisture invites rust.
Rub on a thin film and wipe away the excess. The pan should look nearly dry.
Keep it somewhere dry with airflow. Add a paper towel between stacked pans.
If you only do one thing, dry the pan fully. That habit alone prevents many rust and sticking problems.
Oils, Tools, and Pan Types
The right supplies keep seasoning simple. Not every cast iron pan is seasoned the same way, so check your pan type first.
Tool and Material Fit
Tool Fit Dashboard
Match your supplies to how often you cook with iron.
Practical guide
You cook with iron once or twice a week. One oil, a brush, and a cloth are usually enough.
You cook with iron most days or own several pans. A dedicated scrubber may save time.
Most beginners do well with the simple setup. Add tools only when a real need shows up.
Helpful Supplies
This article may contain affiliate links. If you buy through these links, we may earn a small commission at no extra cost to you. We only mention products that fit the topic and recommend checking current specs and care instructions directly with the manufacturer.
Cast Iron Seasoning Oil
A dedicated oil can make thin, even coats easier to apply. Many home cooks find it convenient to keep one bottle for pan care.
Cast Iron Scrubber or Brush
A sturdy scrubber may help lift stuck food without soaking the pan. Check that it is suitable for your pan’s finish.
When Home Care Is Not Enough
DIY vs Manufacturer or Professional Help
Routine Priority Meter
This chart ranks habits by how often they matter in everyday care. It is a rough guide, not lab data.
Typical routine priority
Drying after washing
Thin oil wipe
Avoiding long soaks
Full oven reseason
Daily habits matter most, while a full reseason is the occasional fix.
When to Contact a Manufacturer or Professional: Reach out to the maker if the pan cracks, warps, or the handle loosens, or if enamel chips. For a product safety concern, visit CPSC. For blistering burns, or burns on the face, hands, or joints, seek medical help. General food information is also on the FDA site.
Frequently Asked Questions
How often should you season a cast iron skillet?
Full oven seasoning is usually needed only when the pan is new, rusty, or worn. Between those times, a thin oil wipe after cleaning often keeps the surface in good shape.
Do you need to season a pre-seasoned cast iron skillet?
Not always. You can usually cook right away, but a few extra thin coats may help build a smoother surface. Check the manufacturer’s instructions.
What oil is best for seasoning a cast iron skillet?
Many home cooks use a neutral oil with a high smoke point. Check the oil label and the pan maker’s guidance, since recommendations vary.
Can you season a cast iron skillet on the stovetop?
Some cooks do, but oven seasoning heats the whole pan more evenly. If you try the stovetop, ventilate well and follow the manufacturer’s guidance.
Why is my cast iron skillet sticky after seasoning?
The usual cause is too much oil or too little heat time. Wipe the oil very thin and rebake, or scrub the sticky layer off and start again.
Do you have to reseason after washing with soap?
Not always. Many home cooks use mild soap, then dry and lightly oil the pan. Season fully only if the surface looks bare, dull, or rusty.
Final Thoughts
Now you know when to season a cast iron skillet: when it is new, worn, rusty, or sticky. Otherwise, keep daily care simple. Check the manufacturer’s instructions, confirm care needs for enameled or special finishes, follow food-safety guidance, and seek professional or medical help for serious burns or damaged cookware.
